Welcome to the official Janome.com Blog Page!

  • 5/5/2021

    Celebrate Mom by designing and embroidering customized ribbons with your Janome embroidery machine, to compliment your gift wrapping. Let her know just how much she means to you by including a special message of your choice. 


    Janome Artisan Maday from Sustainable Textile Design has the perfect solution to add that special touch to all of your gifts for Mother’s Day and throughout the year! 


                              A picture containing text

Description automatically generated


    Supplies:

    Iris Polyester ultra brite embroidery thread – assorted colors

    Bobbin thread – white 

    RE20 embroidery hoop

    Sulky Sticky Fabri-Solvy stabilizer (water-soluble)

    Tear-away stabilizer (to float under the length of the hoop)

    Cotton ribbon 1.5” wide (your choice of color and desired length)

    Organ needle size 12 or 14

    Water-soluble marking pen (optional)

    Janome curved embroidery scissors


    Machine Used

    Janome Skyline 9


    Wrapping Paper

    Assorted Florals 


    Don’t forget mom’s presents! 


    Celebrating moms and all mother figures around the world this month is always inspiring to me. 


    I look forward to the love and unique experiences this holiday brings to my family. There are always opportunities to spoil the mother figures in our lives and we never take for granted the chance to show them just how much we care about them.


    While I pondered what project to create for this submission, I knew that I wanted it to be customizable for any occasion, quick, and most importantly, meaningful

    The ribbon that I used for this project was repurposed from another package I received in the mail. It was too good not to reuse it.


    Let’s get started!


    • Hoop the sticky Sulky wash away stabilizer


    • Position multiple lengths of ribbon using the entire hoop leaving small gaps in between each row. I made sure to twist the ribbon so that the text would appear right side when the ribbon was folded during gift wrapping. 


    HINT: Practice wrapping the gift so that you have an idea of how the text will lay once embroidered. You can use water-soluble pens to mark where you want the monogramming to appear exactly when you hoop it. 


    A picture containing indoor

Description automatically generated


    • You are ready to customize your ribbon message (s). Going to the home icon on the upper right-hand side, select ABC.


    • Choose the text box that appears vertically (AB highlighted below) so that it runs the length of the ribbon. For letter-size, I chose Small and Medium and most of the time, lower case letters. If something does not look correct, you can use the “trash can” icon under “OK” to delete and start over. 

    A picture containing text, indoor, cellphone

Description automatically generatedA close-up of a credit card

Description automatically generated with low confidence


    • As you type your desire phrases you can rotate, curve or space out each individual line of text within the edit screen to further customize your message. 

    A rectangular electronic device

Description automatically generated with low confidenceA picture containing text, electronics, cellphone

Description automatically generated


    • Use arrows on the edit screen to move the text up/down or side to side to help you center the messages. 

     Once you are satisfied with the placement, you are ready to embroider!


    A picture containing text

Description automatically generated


    HINT: Keep in mind that the ribbon will wrap around the objects, so moving the text to appear differently on the ribbon (i.e-top, middle, lower part), helps to see it more clearly. The same applies to the size of the font and thread color used (please see photo below).


    A picture containing text, indoor

Description automatically generated


    • Carefully remove the ribbon from the sticky stabilizer and trim it back. You can dampen the ribbon if you like to remove the stabilizer but without testing it first for color run, I prefer to trim it instead. 

    A picture containing indoor, paper, cloth

Description automatically generated


    Helpful Hints: 

    Use your hoop grid template to assist you in aligning the text of your choice within the width of the ribbon.

    Untread your machine needle and hit the “start” button (when you are ready to start) to ensure that the text will appear in the desired spot before you start embroidering, that way you don’t have to remove stitches if it does not align correctly and ribbon or thread won’t be wasted. 

    Always “float” a piece of tear-away under the fabri-solvy stabilizer when embroidering on ribbon or delicate fabrics to prevent puckering. Start with a new needle. 

    Measure the boxes you will use to ensure that you have enough ribbon and that your text will appear where it will be readable.


    Now comes the fun part! Gift wrapping Mom’s gifts!


    A picture containing text

Description automatically generated


    I hope this quick project inspires you to use and experiment with embroidering on ribbons to create customizable gift-wrapping accessories that are sure to delight makers and recipients alike. Testing on a small piece of ribbon will inform how best to stabilize the ribbon before making yards of it.  Have fun and happy gift-giving for all occasions!


    Maday.

     www.sustainabletextiledesign.com

  • 8/3/2021

    Ah, the dreaded zipper! One of the most essential parts of creating bags, garments, cosplay, and home decor is also one of the most frightening for many sewing enthusiasts. We are here to say fear no more! Janome Maker Meredith Daniel from Olivia Jane Handcrafted is going to show you not only how easy it is to install a zipper by creating a zippered pocket in anything!!!  After you add zippered pouches to everything, you can use this skill builder to go forward adding zippers pillows, dresses, and so much more!


    hidden zipper pocket tutorial


    A zippered pocket is such a useful addition to any bag! Did you know they are also incredibly easy to insert? This tutorial will show you how to do just that, and you will be an expert in no time at all! 

    hidden zipper pocket tutorial


    You'll need just a couple of things:

    • the fabric you want to put a zipper pocket into
    • a zipper the length of you want your pocket opening (I'm using a 7" metal zipper)
    • a cut of fabric for your pocket (you'll need less than a fat quarter!)
    • a scrap of interfacing (I'm using SF 101)
    • a marking tool, ruler, and cutting tools

      hidden zipper pocket tutorial


    To demonstrate this technique, I'm installing a zipper on the front of my Basic Drawstring Bag. It would also make a great addition to my Mosaic Heart Tote, but you can use this to add a pocket to whatever you need! I am using my Janome Skyline S9 with a walking foot for the whole of this tutorial. That's right! You don't even need a zipper foot. Let's get started!


    Cut two pieces of interfacing 1.5"x 1" longer than your zipper. I cut a piece 1.5x8". Cut two matching pocket bags. They should be at least 1.5" longer than your zipper, and you will need at least 1" above wherever your zipper is at. I cut two pieces measuring 11x7.5".  Mark the placement of your zipper opening on the outer fabric. I find it useful to crease the fabric where I want the zipper to be, and then I have an accurate way to tell where to add interfacing.


           hidden zipper pocket tutorial   hidden zipper pocket tutorial

    Place one strip of interfacing on the wrong side of your outer fabric. Center it over where the zipper will be placed, and fuse according to the manufacturer's instructions. Repeat this on the wrong side of one pocket piece. The interfacing needs to be placed 1/2" under the top of the pocket piece. 


    **Tip: to help protect your iron and your ironing board cover, use a pressing cloth! 


      hidden zipper pocket tutorial


    Find the center of your interfaced section on the pocket piece and draw a line that is 1/4" longer than the teeth of your zipper. I marked a line 7 1/4" for my 7" zipper. Now mark two matching lines 1/4" above and below that line. You will now have three lines. Mark little triangles that reach from the outer corners to about 1/4" in on the centerline. Align your pocket piece and outer fabric right sides together so that the interfaced sections are at the same area since you will be sewing through all layers in the next step. I used clover clips to keep my fabrics still and in line. Sew around the outside rectangle that you drew, overlapping by several stitches once you reach the beginning. All the inner lines are cut lines.


                                 hidden zipper pocket tutorial     hidden zipper pocket tutorial    hidden zipper pocket tutorial


    Using very sharp scissors, cut through all layers along the centerline until you reach the triangle points, then very carefully clip along those diagonal lines to the corners. Do not clip your stitches. Turn your pocket pieces toward the inside through the hole you just cut, and press well.

                                 hidden zipper pocket tutorial


    Align your zipper within the rectangular opening, and begin stitching somewhere in the middle. You will want to use a 1/8" seam allowance since you are sewing close to the folded edge of the fabric. When you get close to the zipper pull, put your needle down, raise your presser foot, and carefully open the zipper so that you can stitch unencumbered by the bulk of the pull. You can then close it again when you need to.

                        hidden zipper pocket tutorial     hidden zipper pocket tutorial    hidden zipper pocket tutorial


    Place your remaining pocket piece right sides together with the sewn pocket piece, and pin the corners. You will now sew all the way around the pocket pieces with a 1/4" seam allowance. Move the main fabric out of the way as you sew. 

                            hidden zipper pocket tutorial    hidden zipper pocket tutorial


    You have now completed your hidden zipper pocket!

                                 hidden zipper pocket tutorial     hidden zipper pocket tutorial    hidden zipper pocket tutorial


    Give yourself a pat on the back for learning a new technique!  You can now include this skill in your sewing toolbox! 

    hidden zipper pocket tutorial  

  • 10/6/2021

    Trying new things on your Janome machine is a great way to feed your creative spirit! Whether it is a new technique, tool, or even if it is just going outside of what you usually do, it can be exhilarating! Janome Maker Meredith from Olivia Jane Handcrafted is trying out the embroidery feature on her Janome Skyline S9 + Janome Artistic Digitizer Software! 


    I've been sewing on my Skyline S9 for a few years now. At first, I was rather intimidated by the embroidery features of the machine, but once I decided to dive in, I realized how much versatility that the machine has when paired with Janome's Artistic Digitizer software. The Janome Artistic Digitizer software is extremely powerful, and my favorite part is that I can take artwork I love and digitize it for embroidery. One of the first projects I did when learning the software was a collection of framed embroidery made from images of some of my favorite fabrics. Today I'm going to show you how you too can create a beautifully textured embroidery based on a favorite fabric. I have framed mine, but you can feature it on a shirt, a pillow, bag, or whatever you like! 


    framed embroidery tutorial


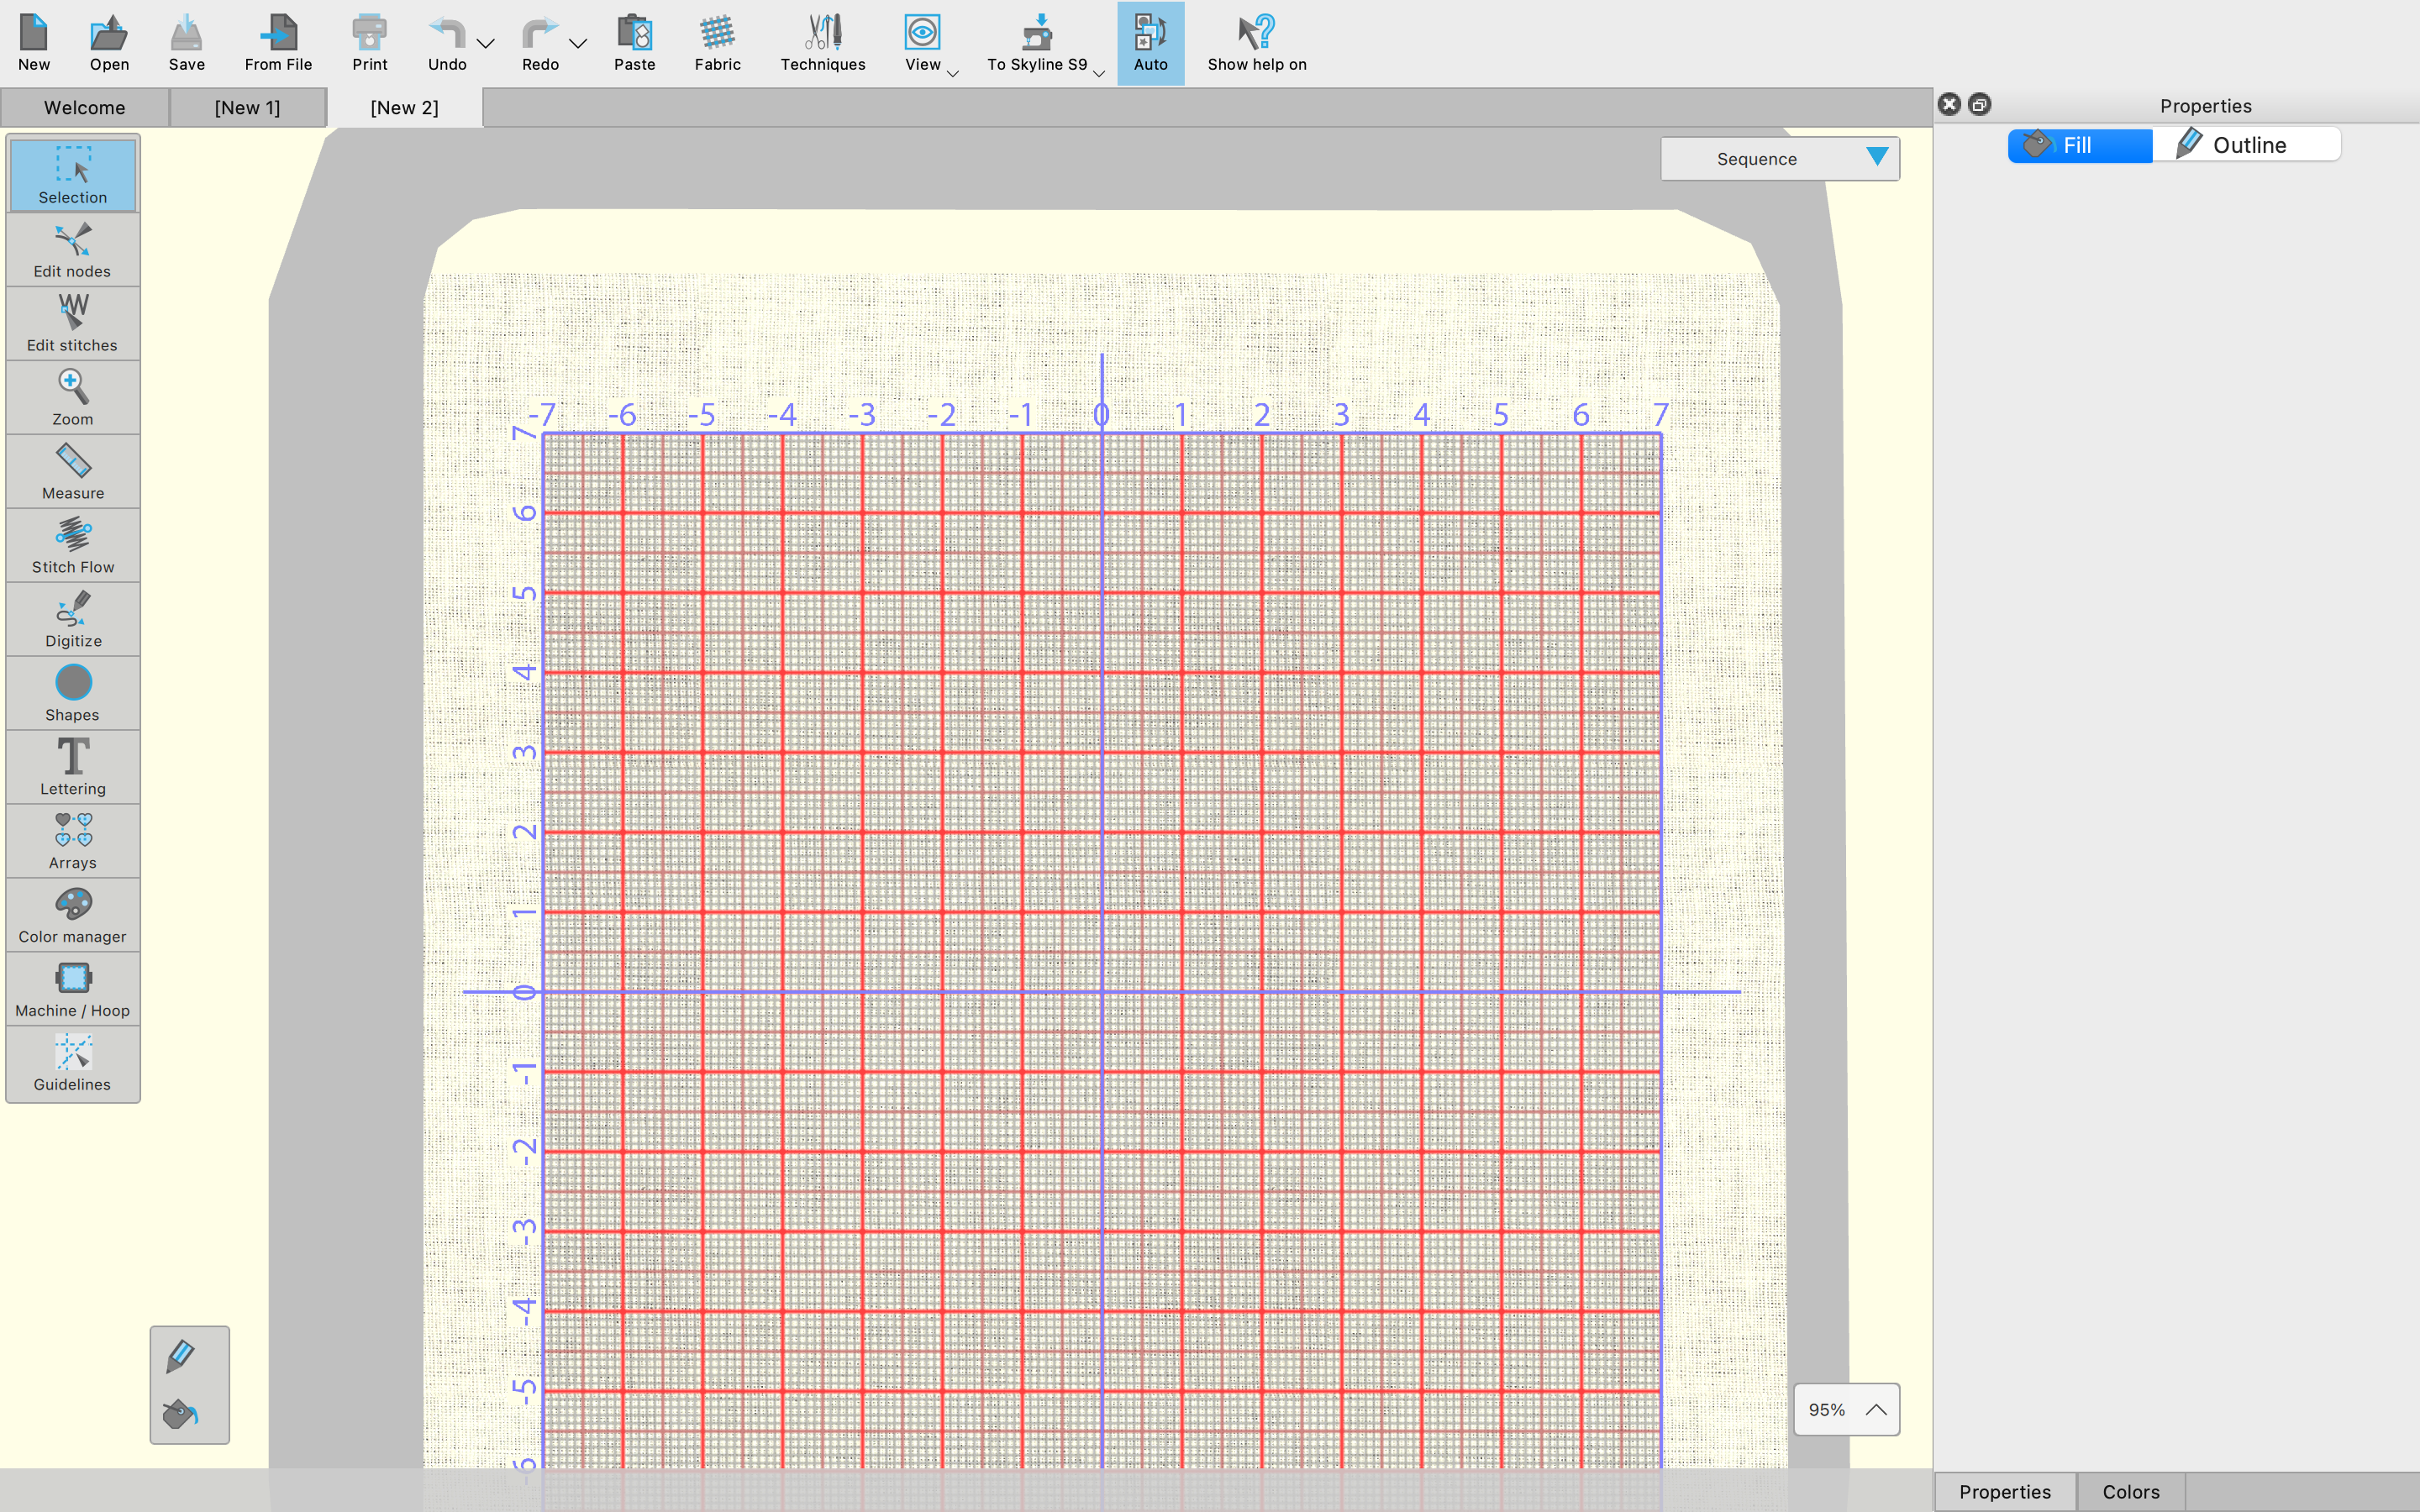
    important note: Because this is a project-based off on the artwork (fabric) of someone else, please keep in mind that without express written permission, it would be entirely unethical and illegal to sell or distribute work you make that is created using the art of another person. So do this only for your own personal enjoyment and do give credit when posting. This tutorial is for private use only. I am using a digital image of a very favorite fabric, Fable by Anna Bond of Rifle Paper Co. Prior to uploading the image to Janome Artistic Digitizer, I cleaned up the surrounding motifs in PixlrX, which is just a free online editing program that makes it easy to remove other parts of an image. Once I had gotten the image down to only the rabbit I wanted to stitch, I opened the Janome Artistic Digitizer Software and opened a new project for the RE20 hoop, which is the largest hoop available for the Skyline S9.


    new artistic project


    I selected the image, which I had saved as a PNG, and then made the following selections:

    open image


    image selection


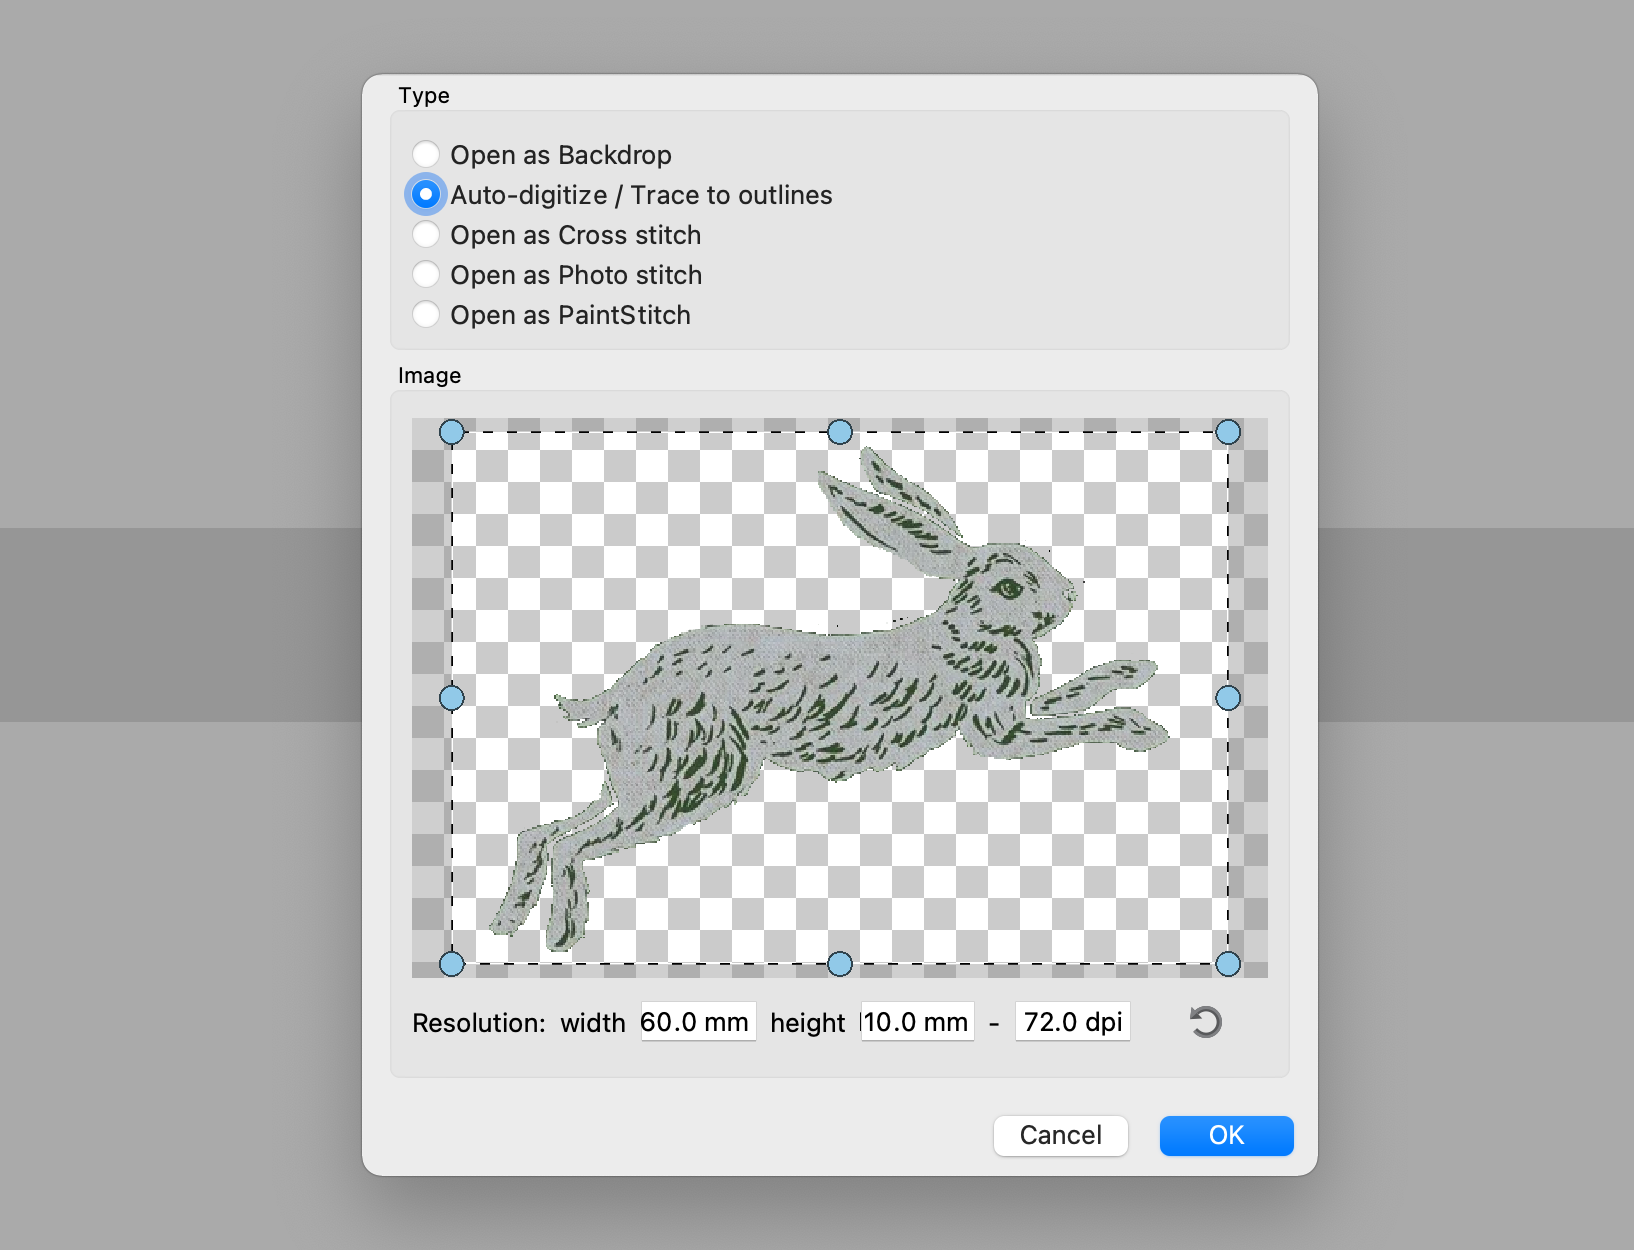
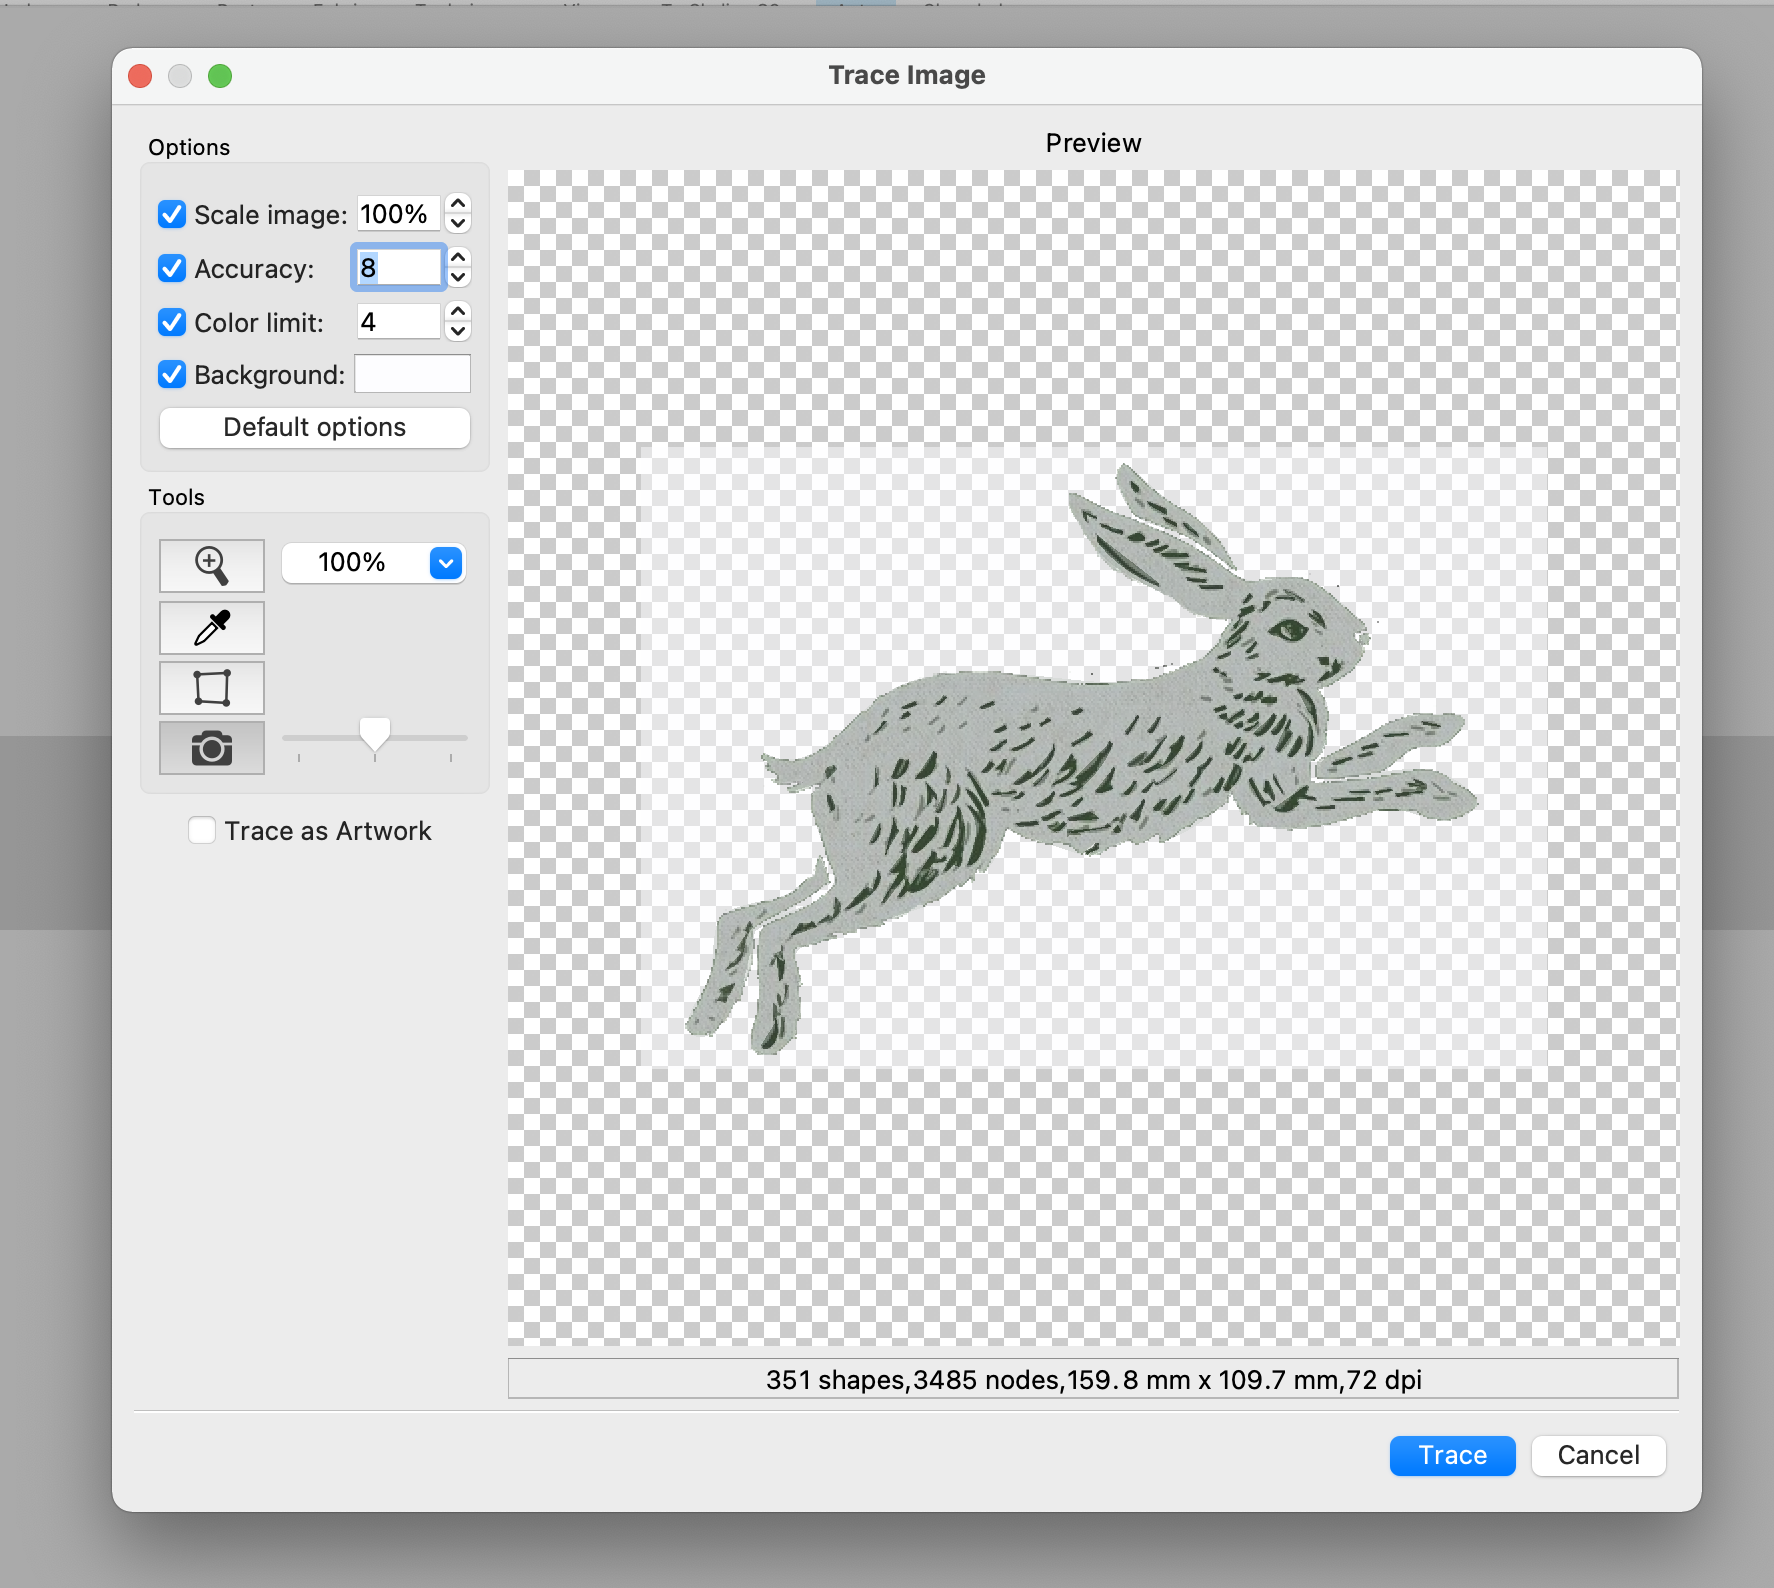
    If you do not want to stitch the background, you must be sure to select the background button and then click the background with the dropper that will appear so that it disappears as seen above. I limited the number of colors to four initially, then brought it down to two once opened the image.


    image placement


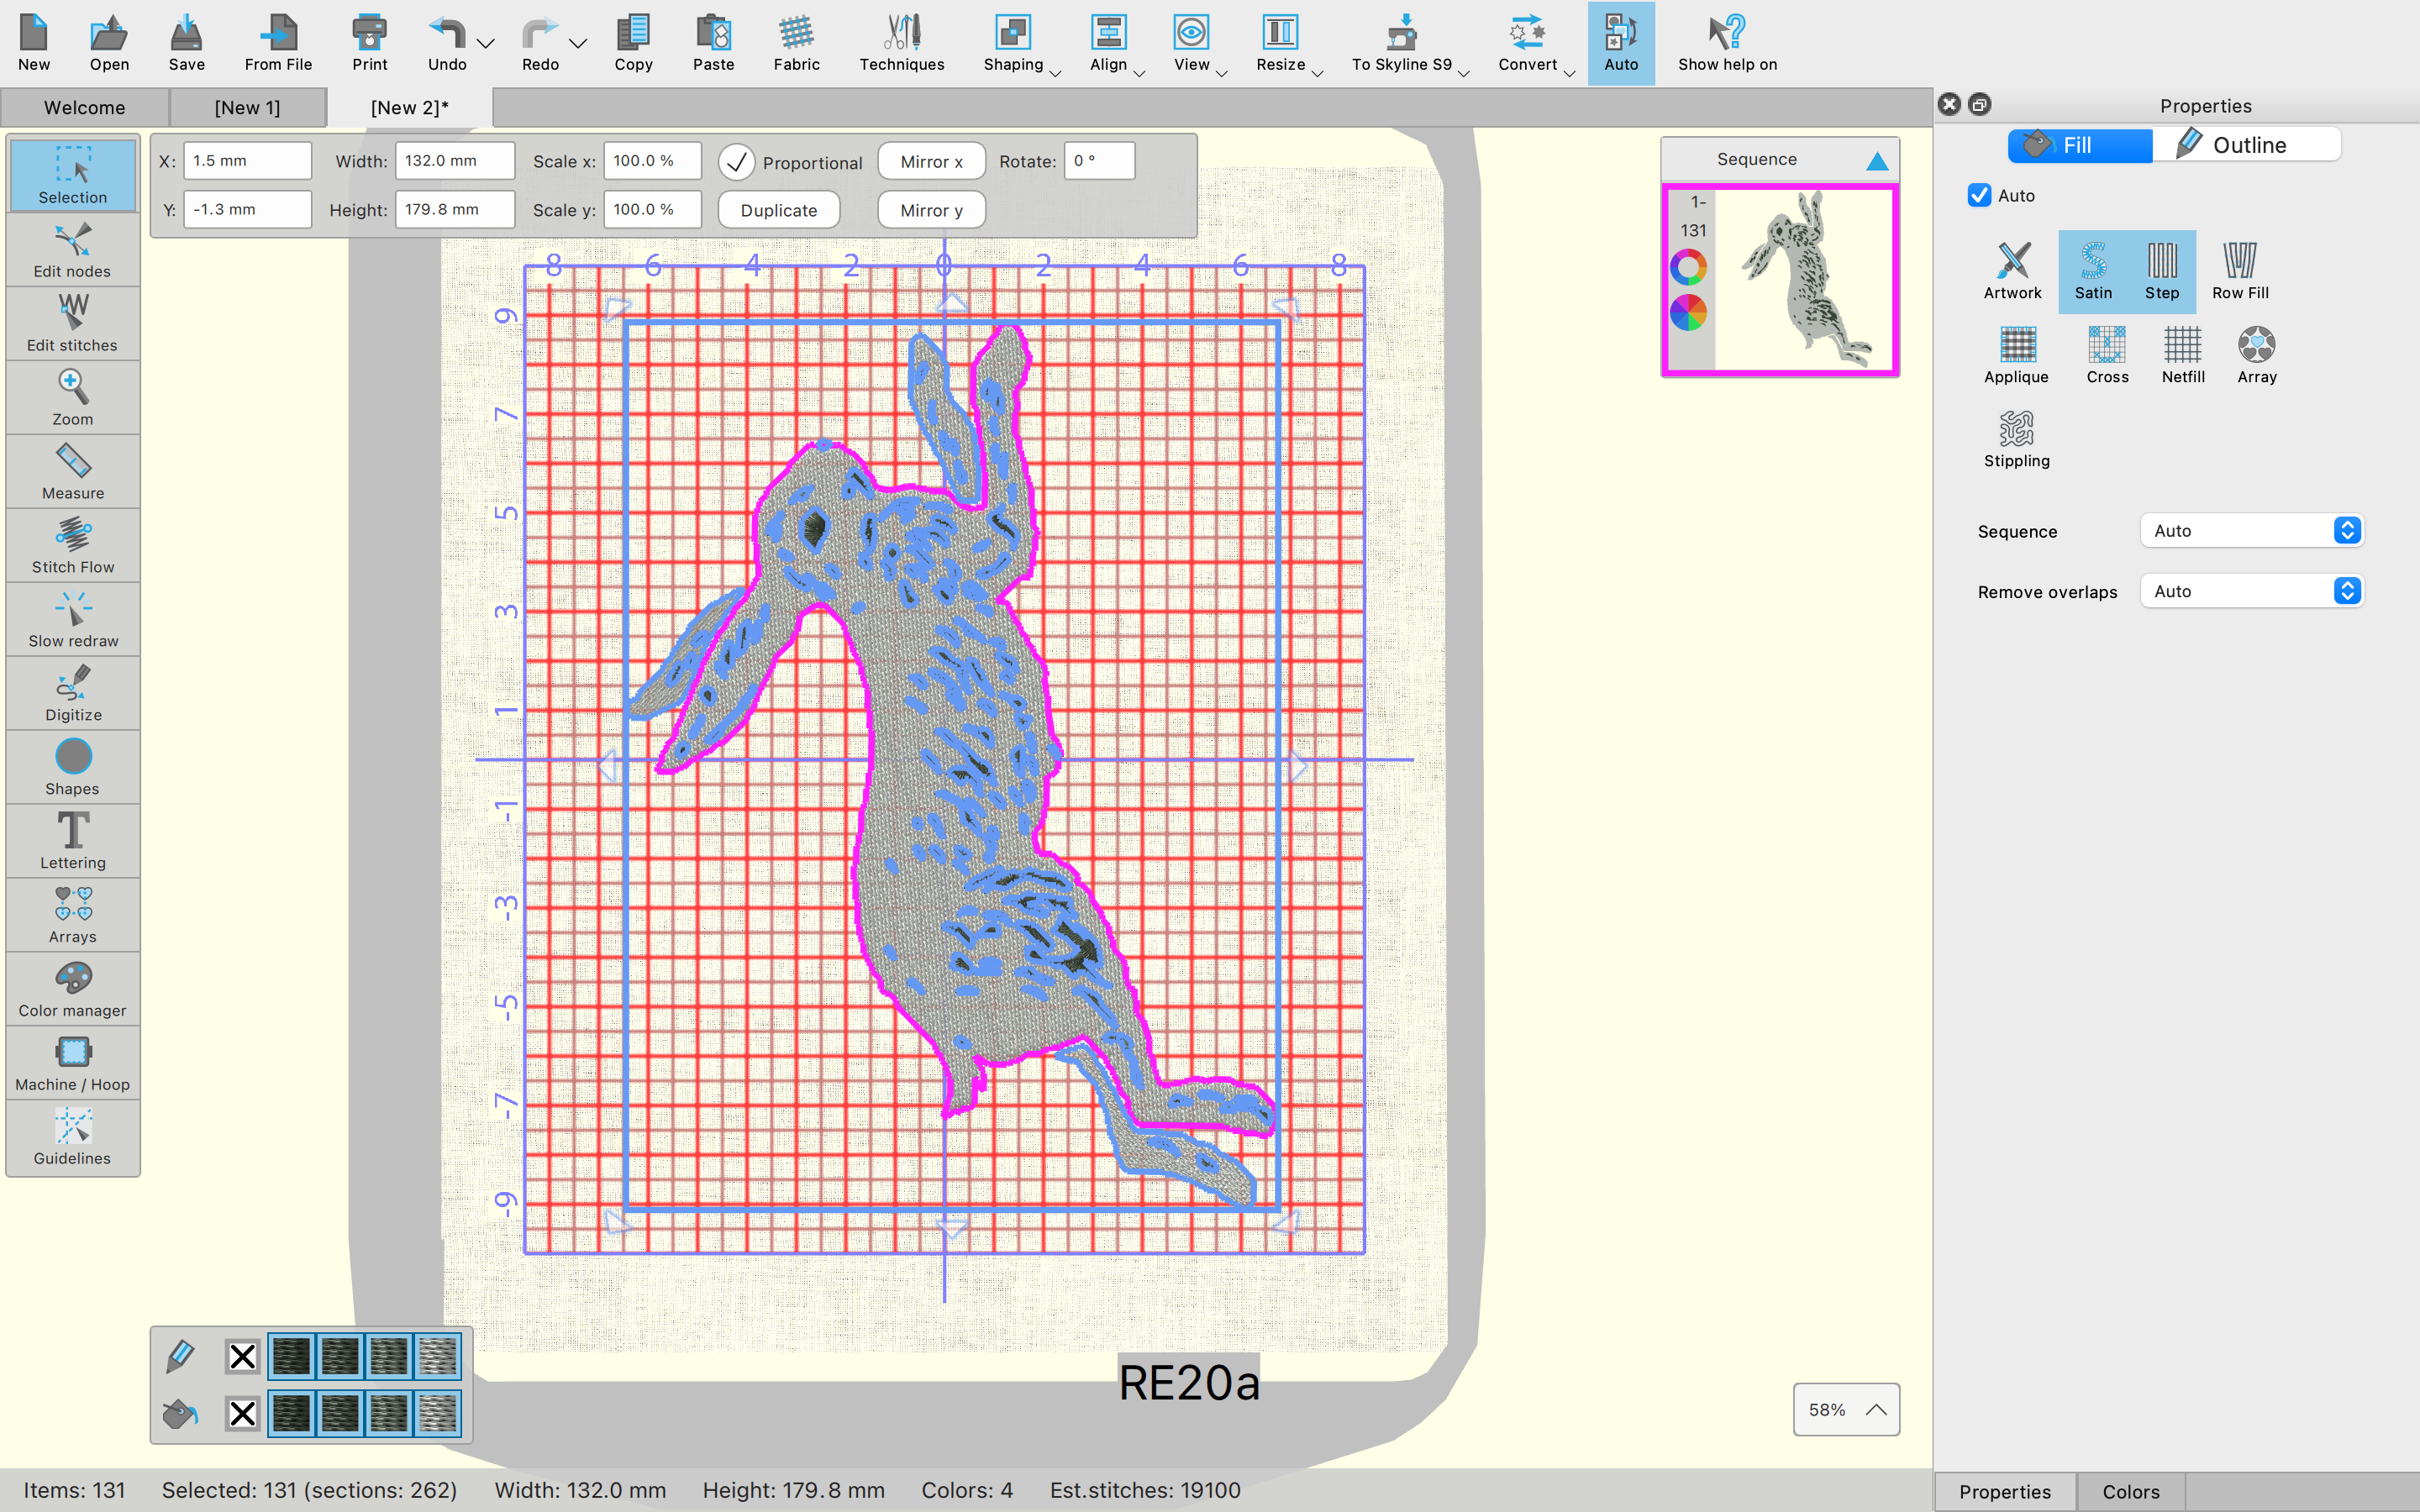
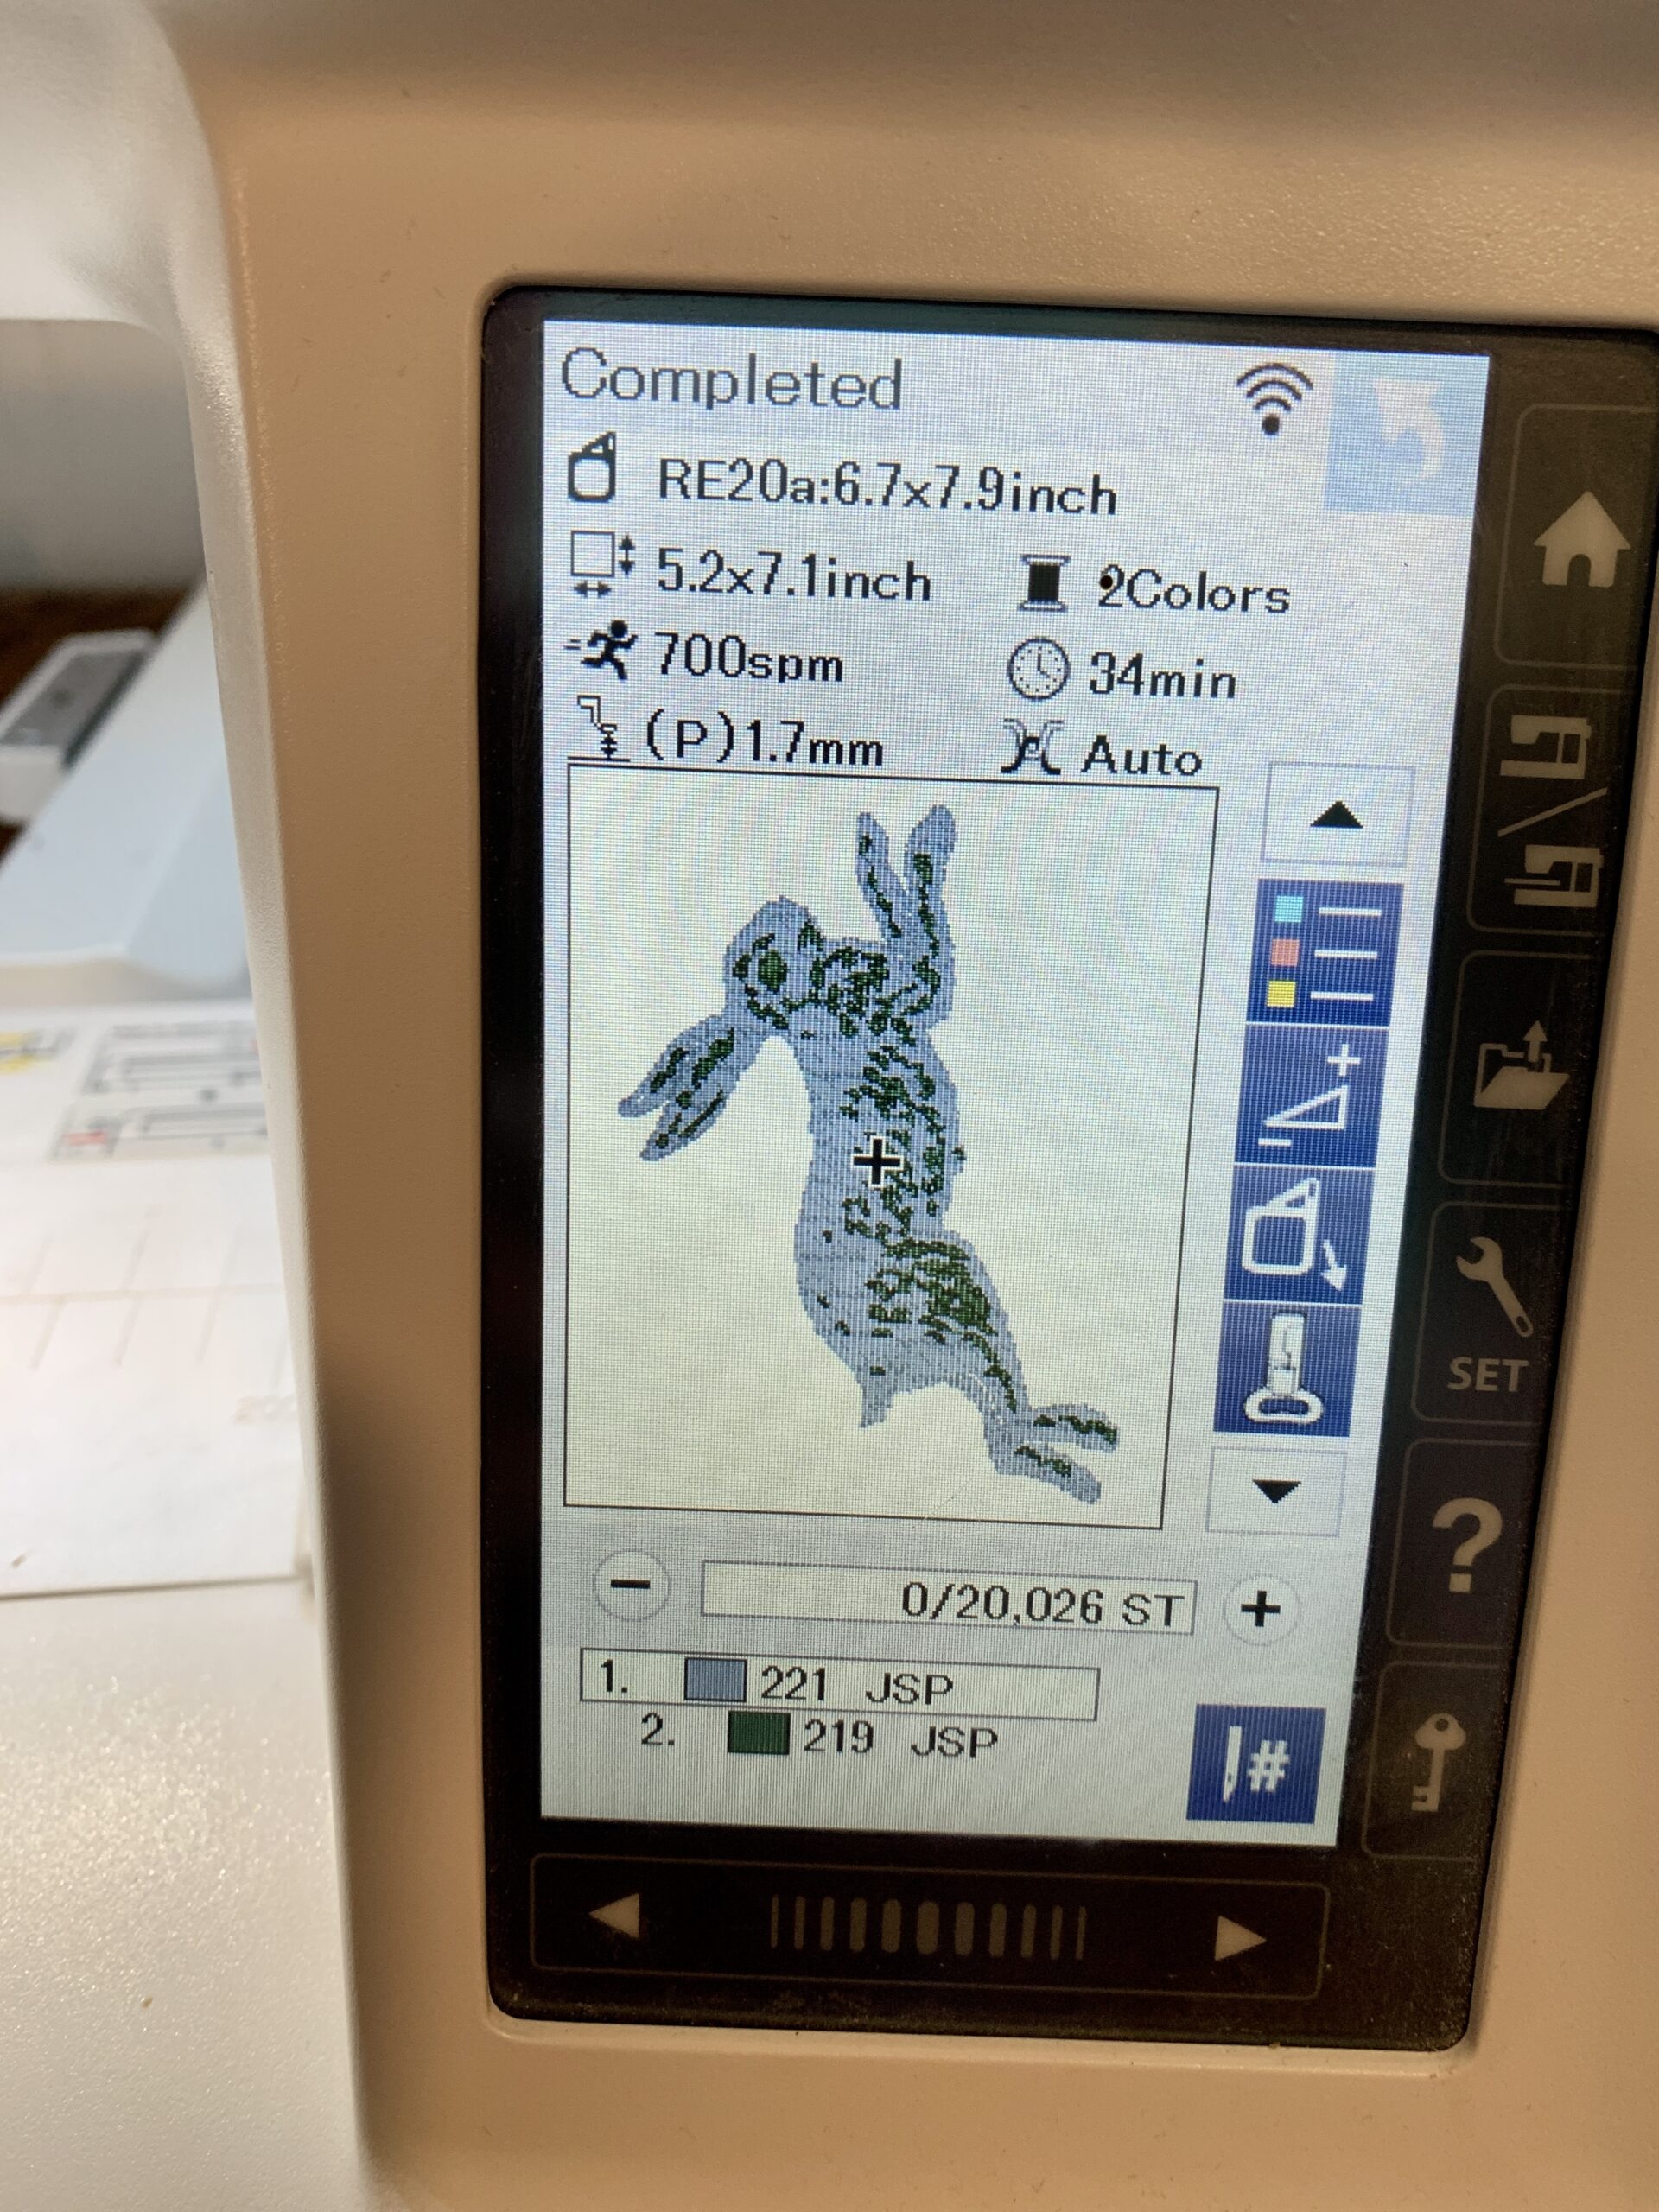
    I rotated and centered the image in the hoop, and when I opened the color manager, and easily changed the color selection from four to two. It just removed the variation in the darker colors. I knew I was just going to be stitching in black and white, so there was no need to deal with thread changes on the machine when I had no intention of changing the colors so many times. By the way, you can totally change the colors to exactly what you will be using to stitch with, but I find that just changing the number of colors is fine, because I can just use whatever colors I want once I go to stitch it out on the machine. Now the important thing to do is to go to the toolbar, click Auto and then Optimize. I did a simple optimization that rearranges the sequence for the most efficient color order. Anytime you are doing your own thing for embroidery, you need to optimize, otherwise, you could easily have a hundred color changes which would take forever.


    export


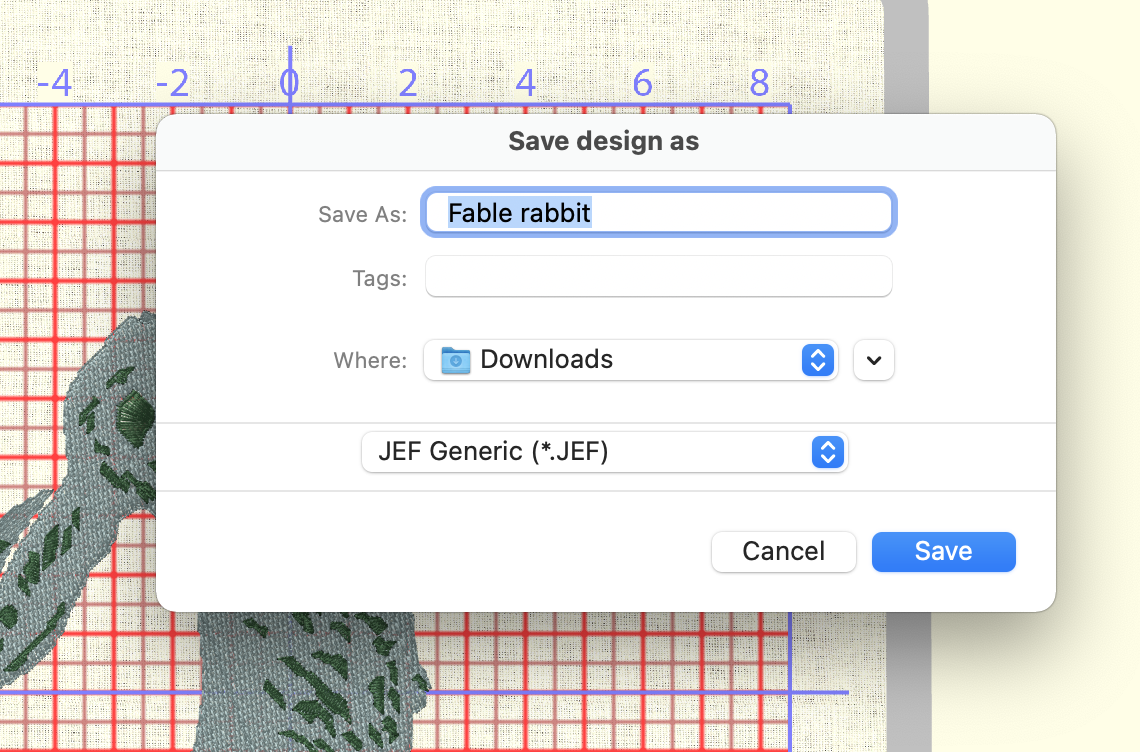
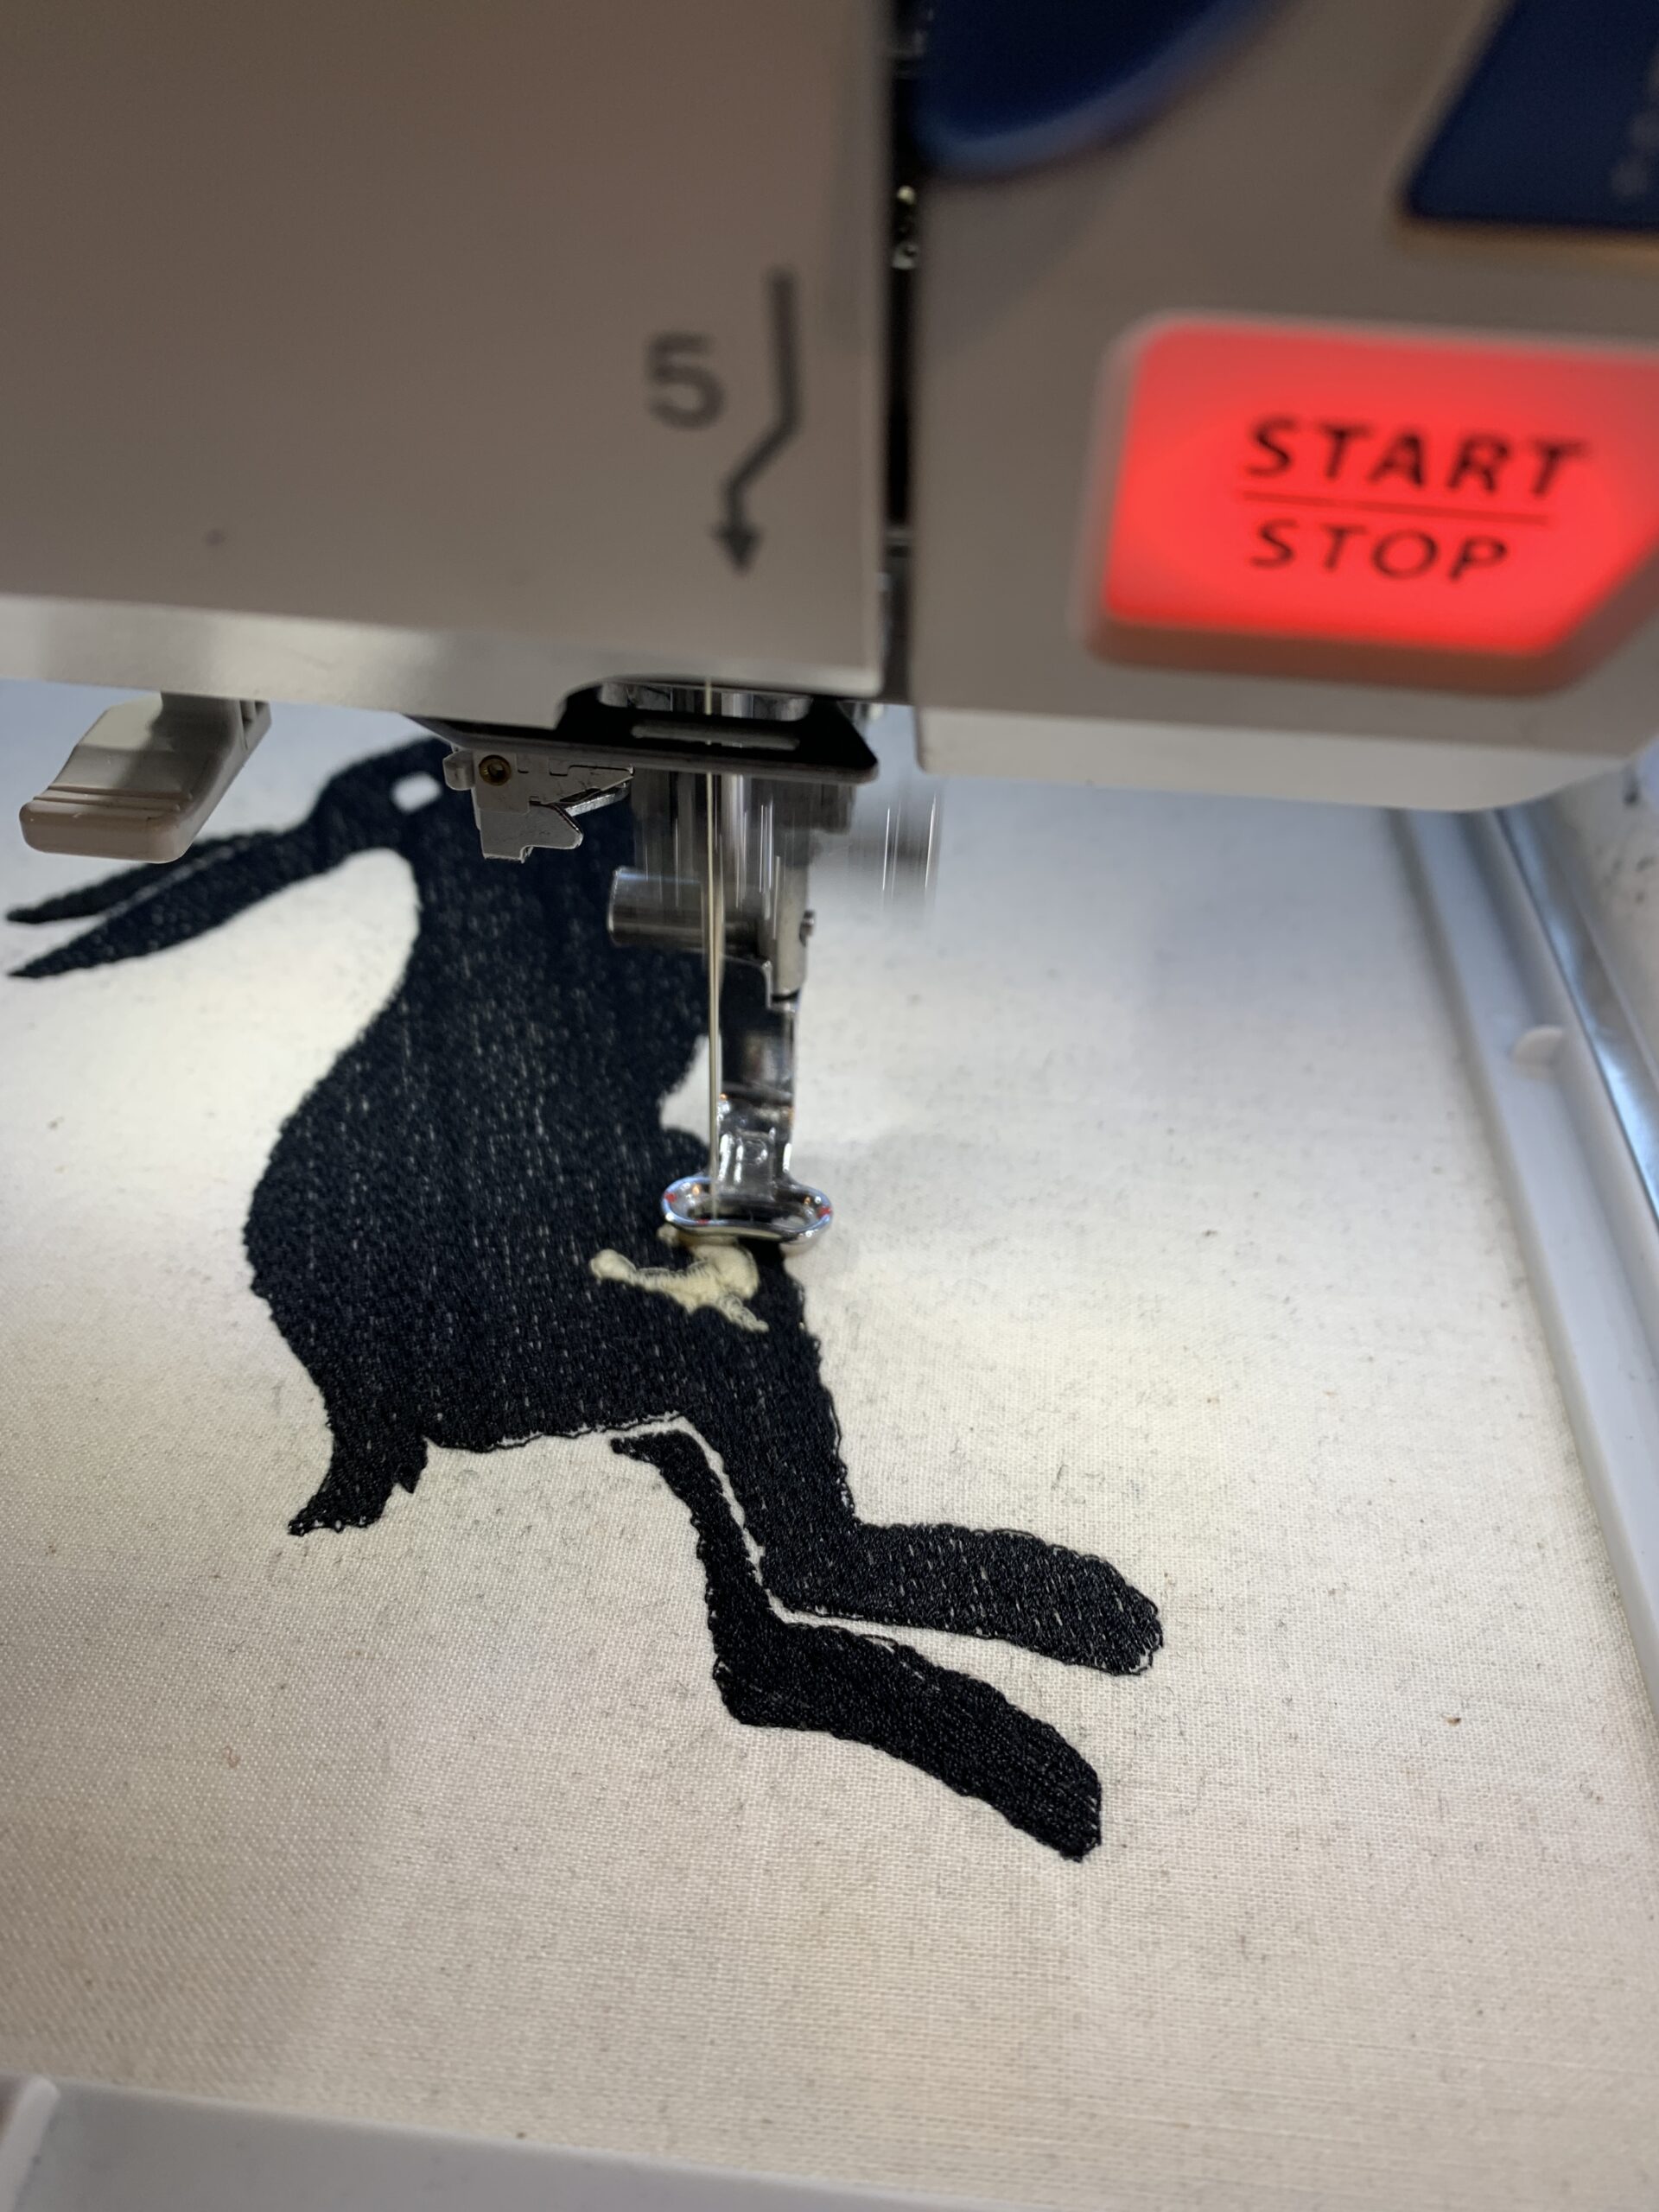
    If your embroidery mockup looks good, then you are ready to save it as a .JEF file then export it. I exported to a USB drive, but the Skyline S9 has wifi capability and can be exported that way, or by plugging in directly to your device. Make sure that your machine is set up for embroidery per the manual instructions, and prepare your fabric and hoop for embroidery. I am using a cotton muslin backed with interfacing and then hooped up with embroidery stabilization paper. Again, I'm using the RE20a hoop. Open your embroidery file on your machine, and start stitching. I love to just sit back and watch the embroidery come to life!


    begin embroidery


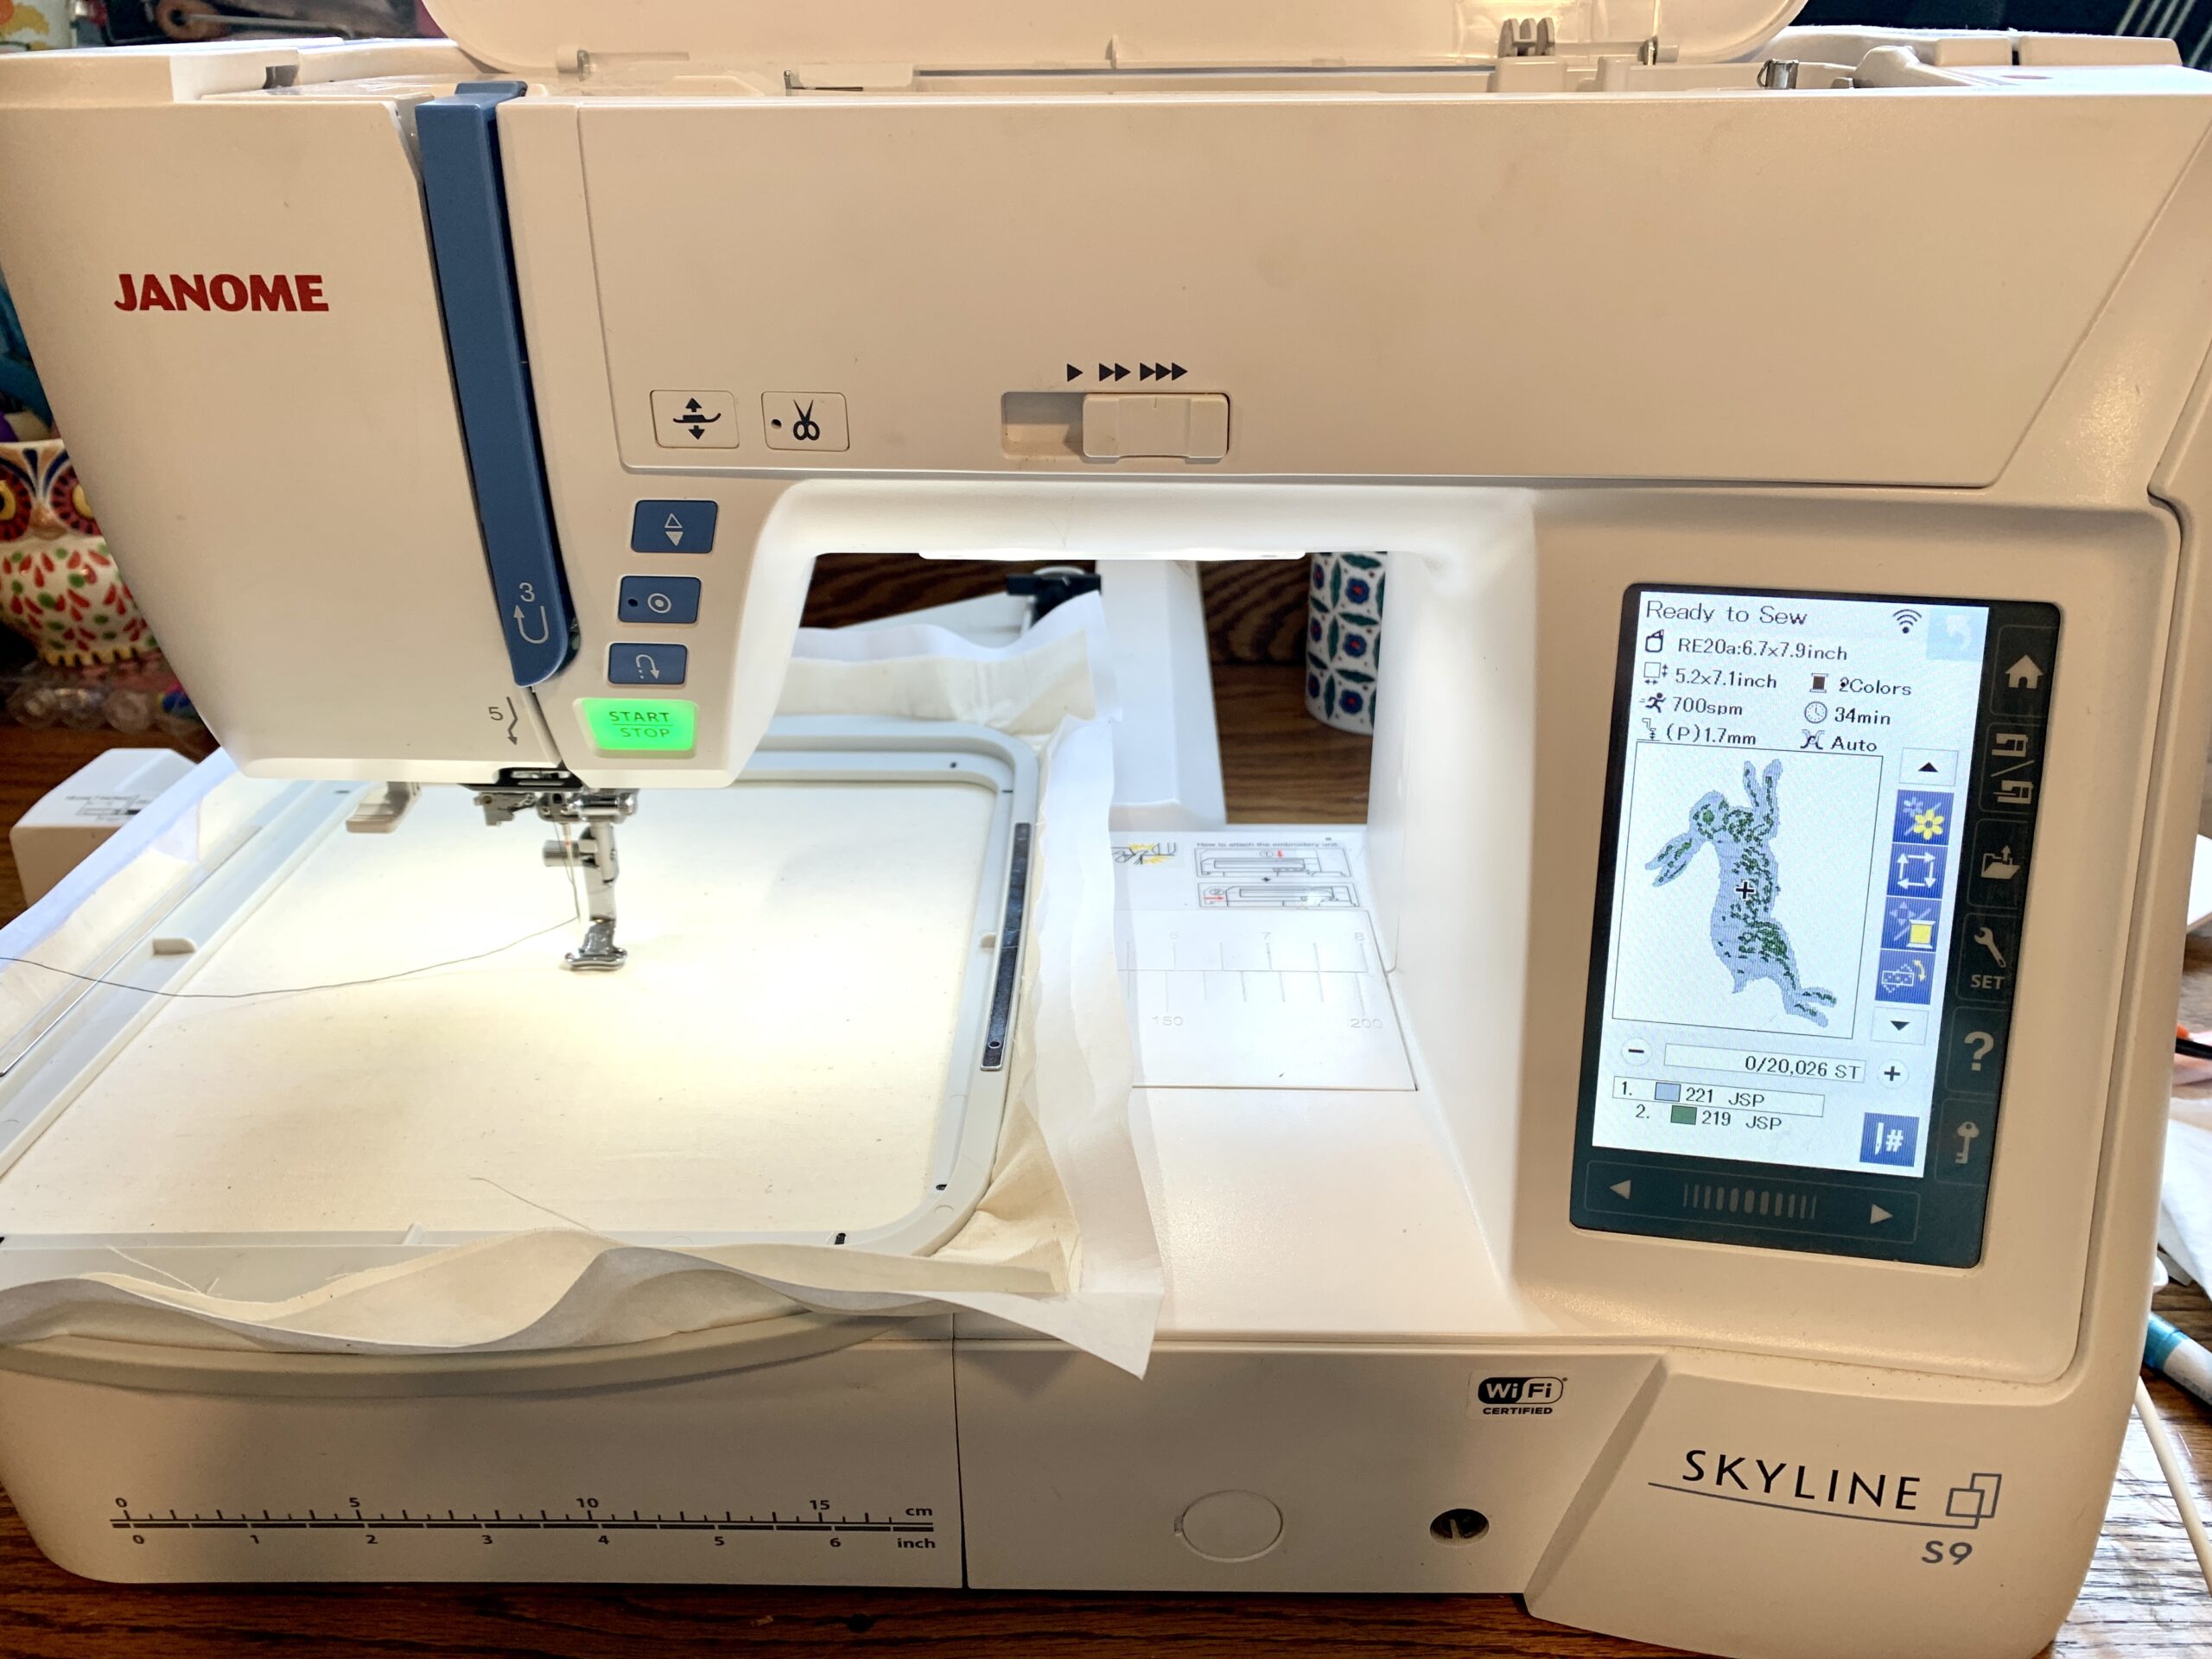
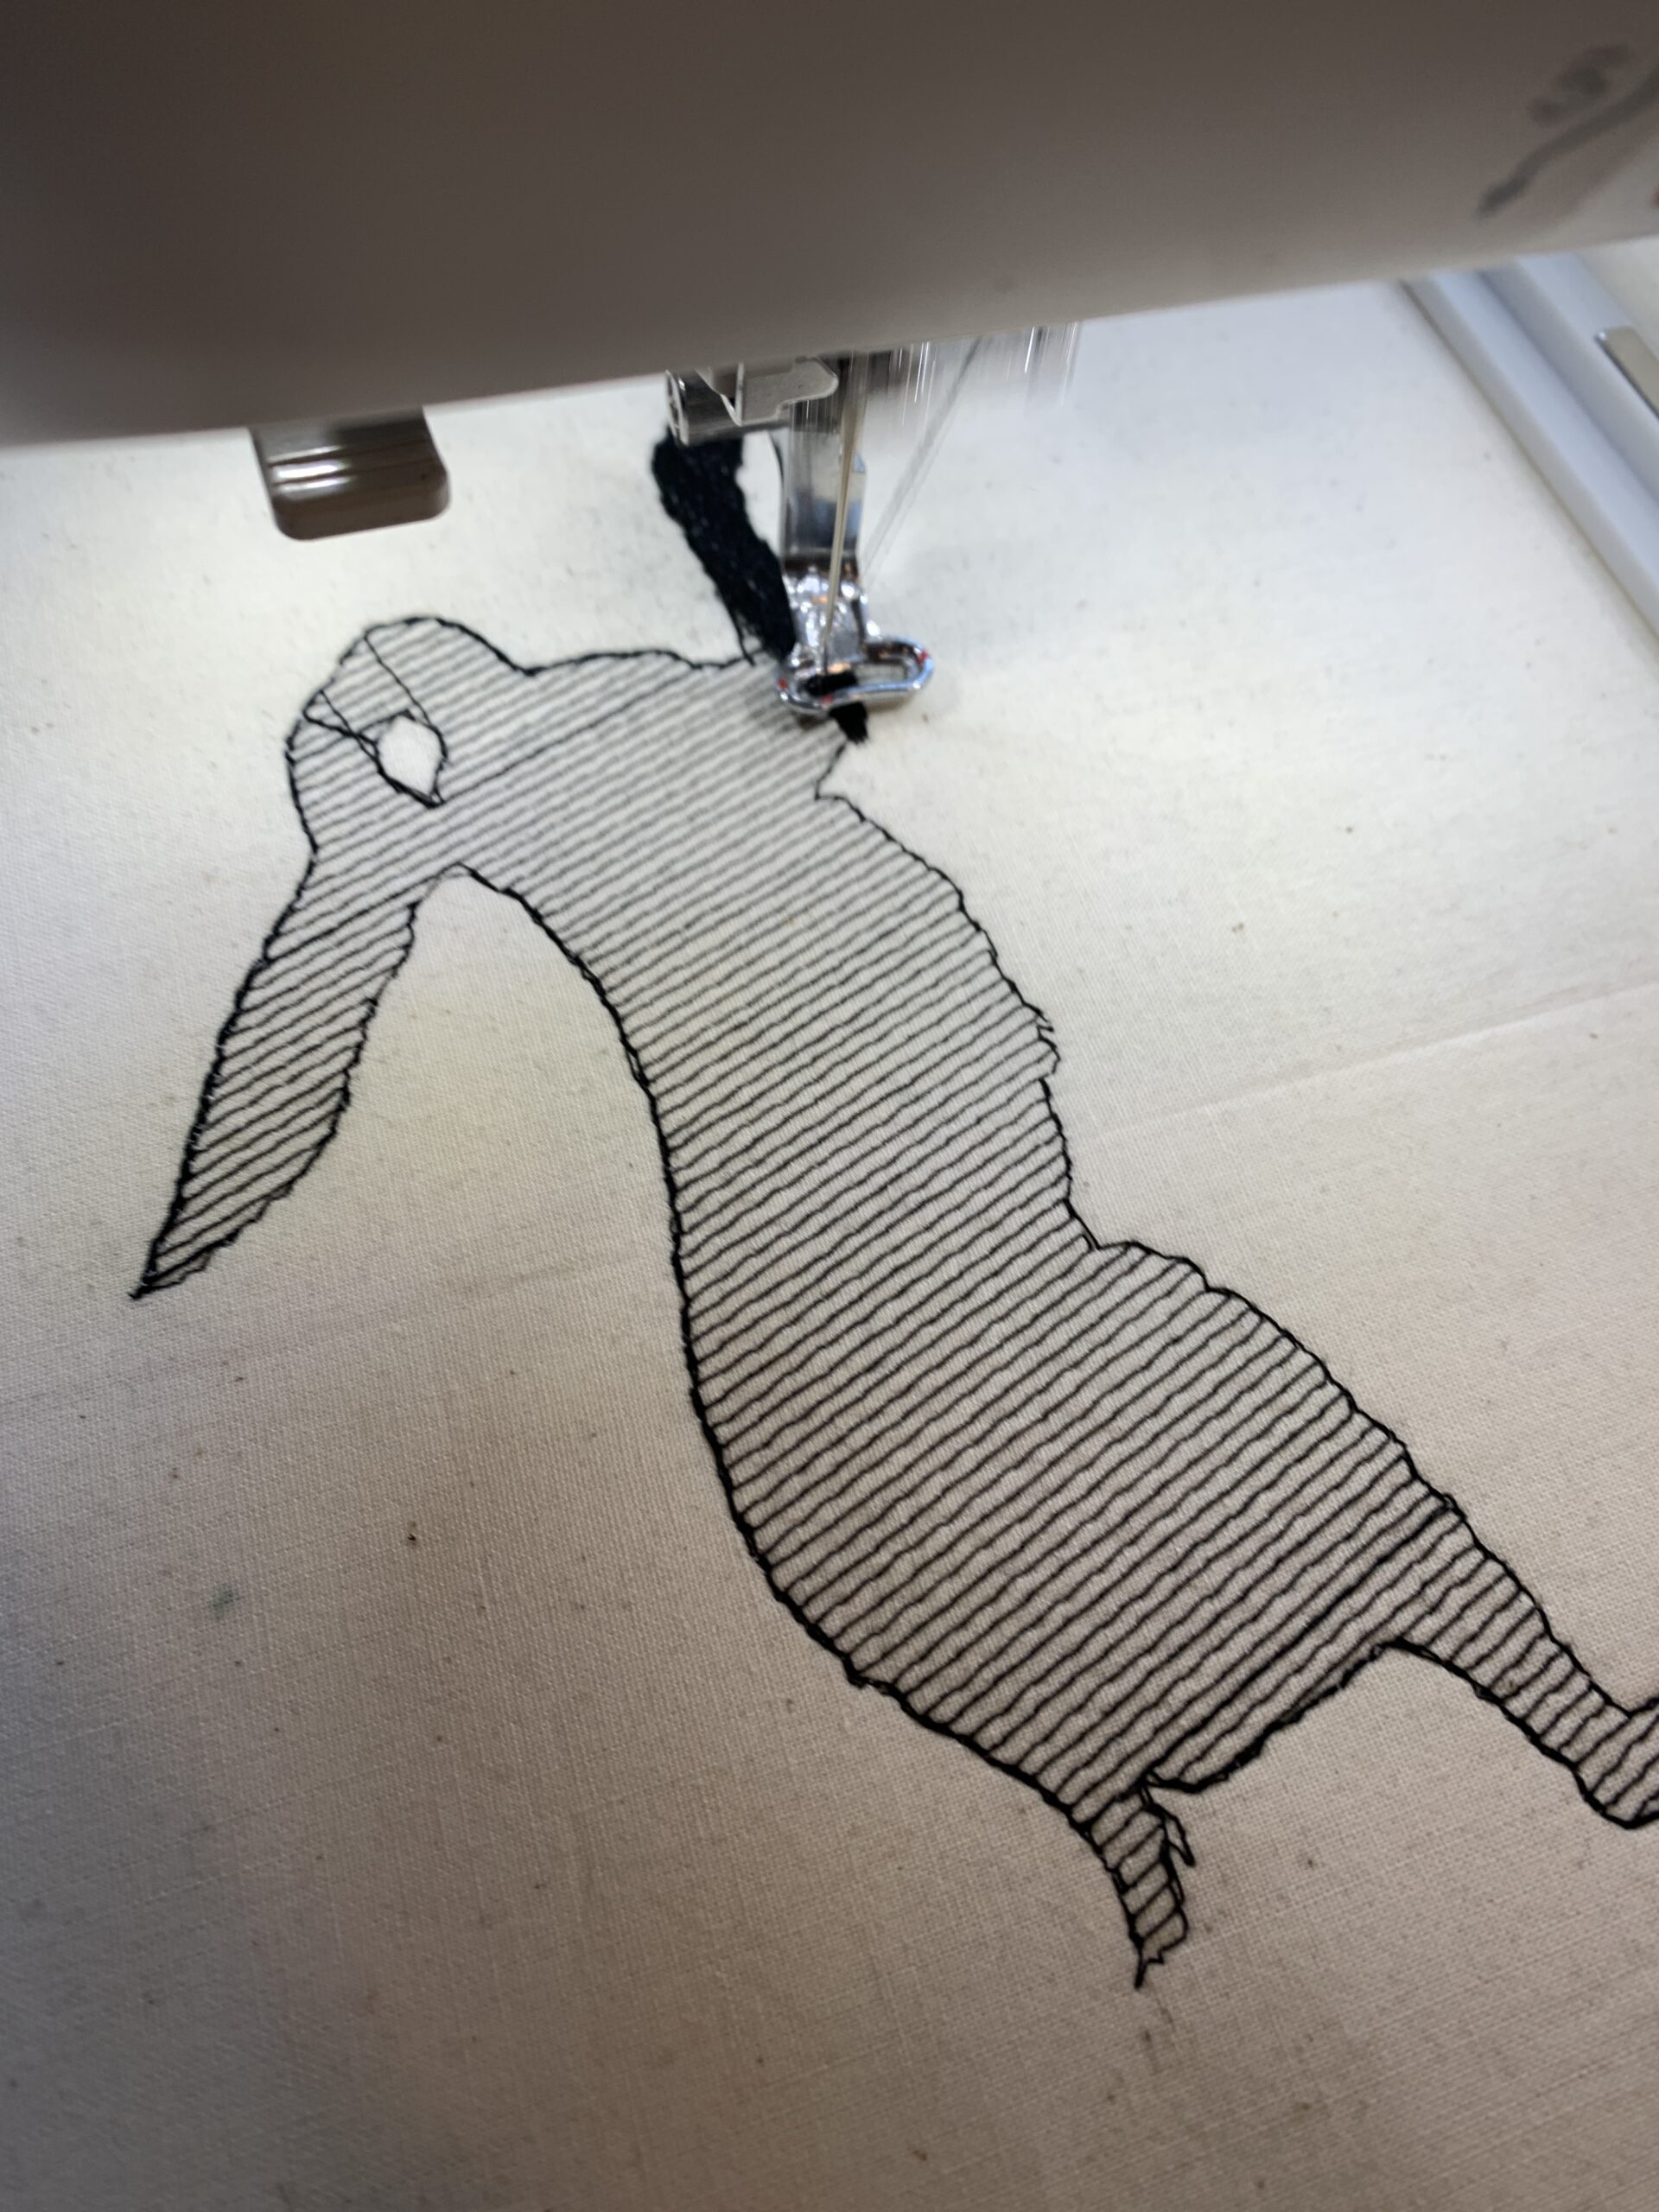
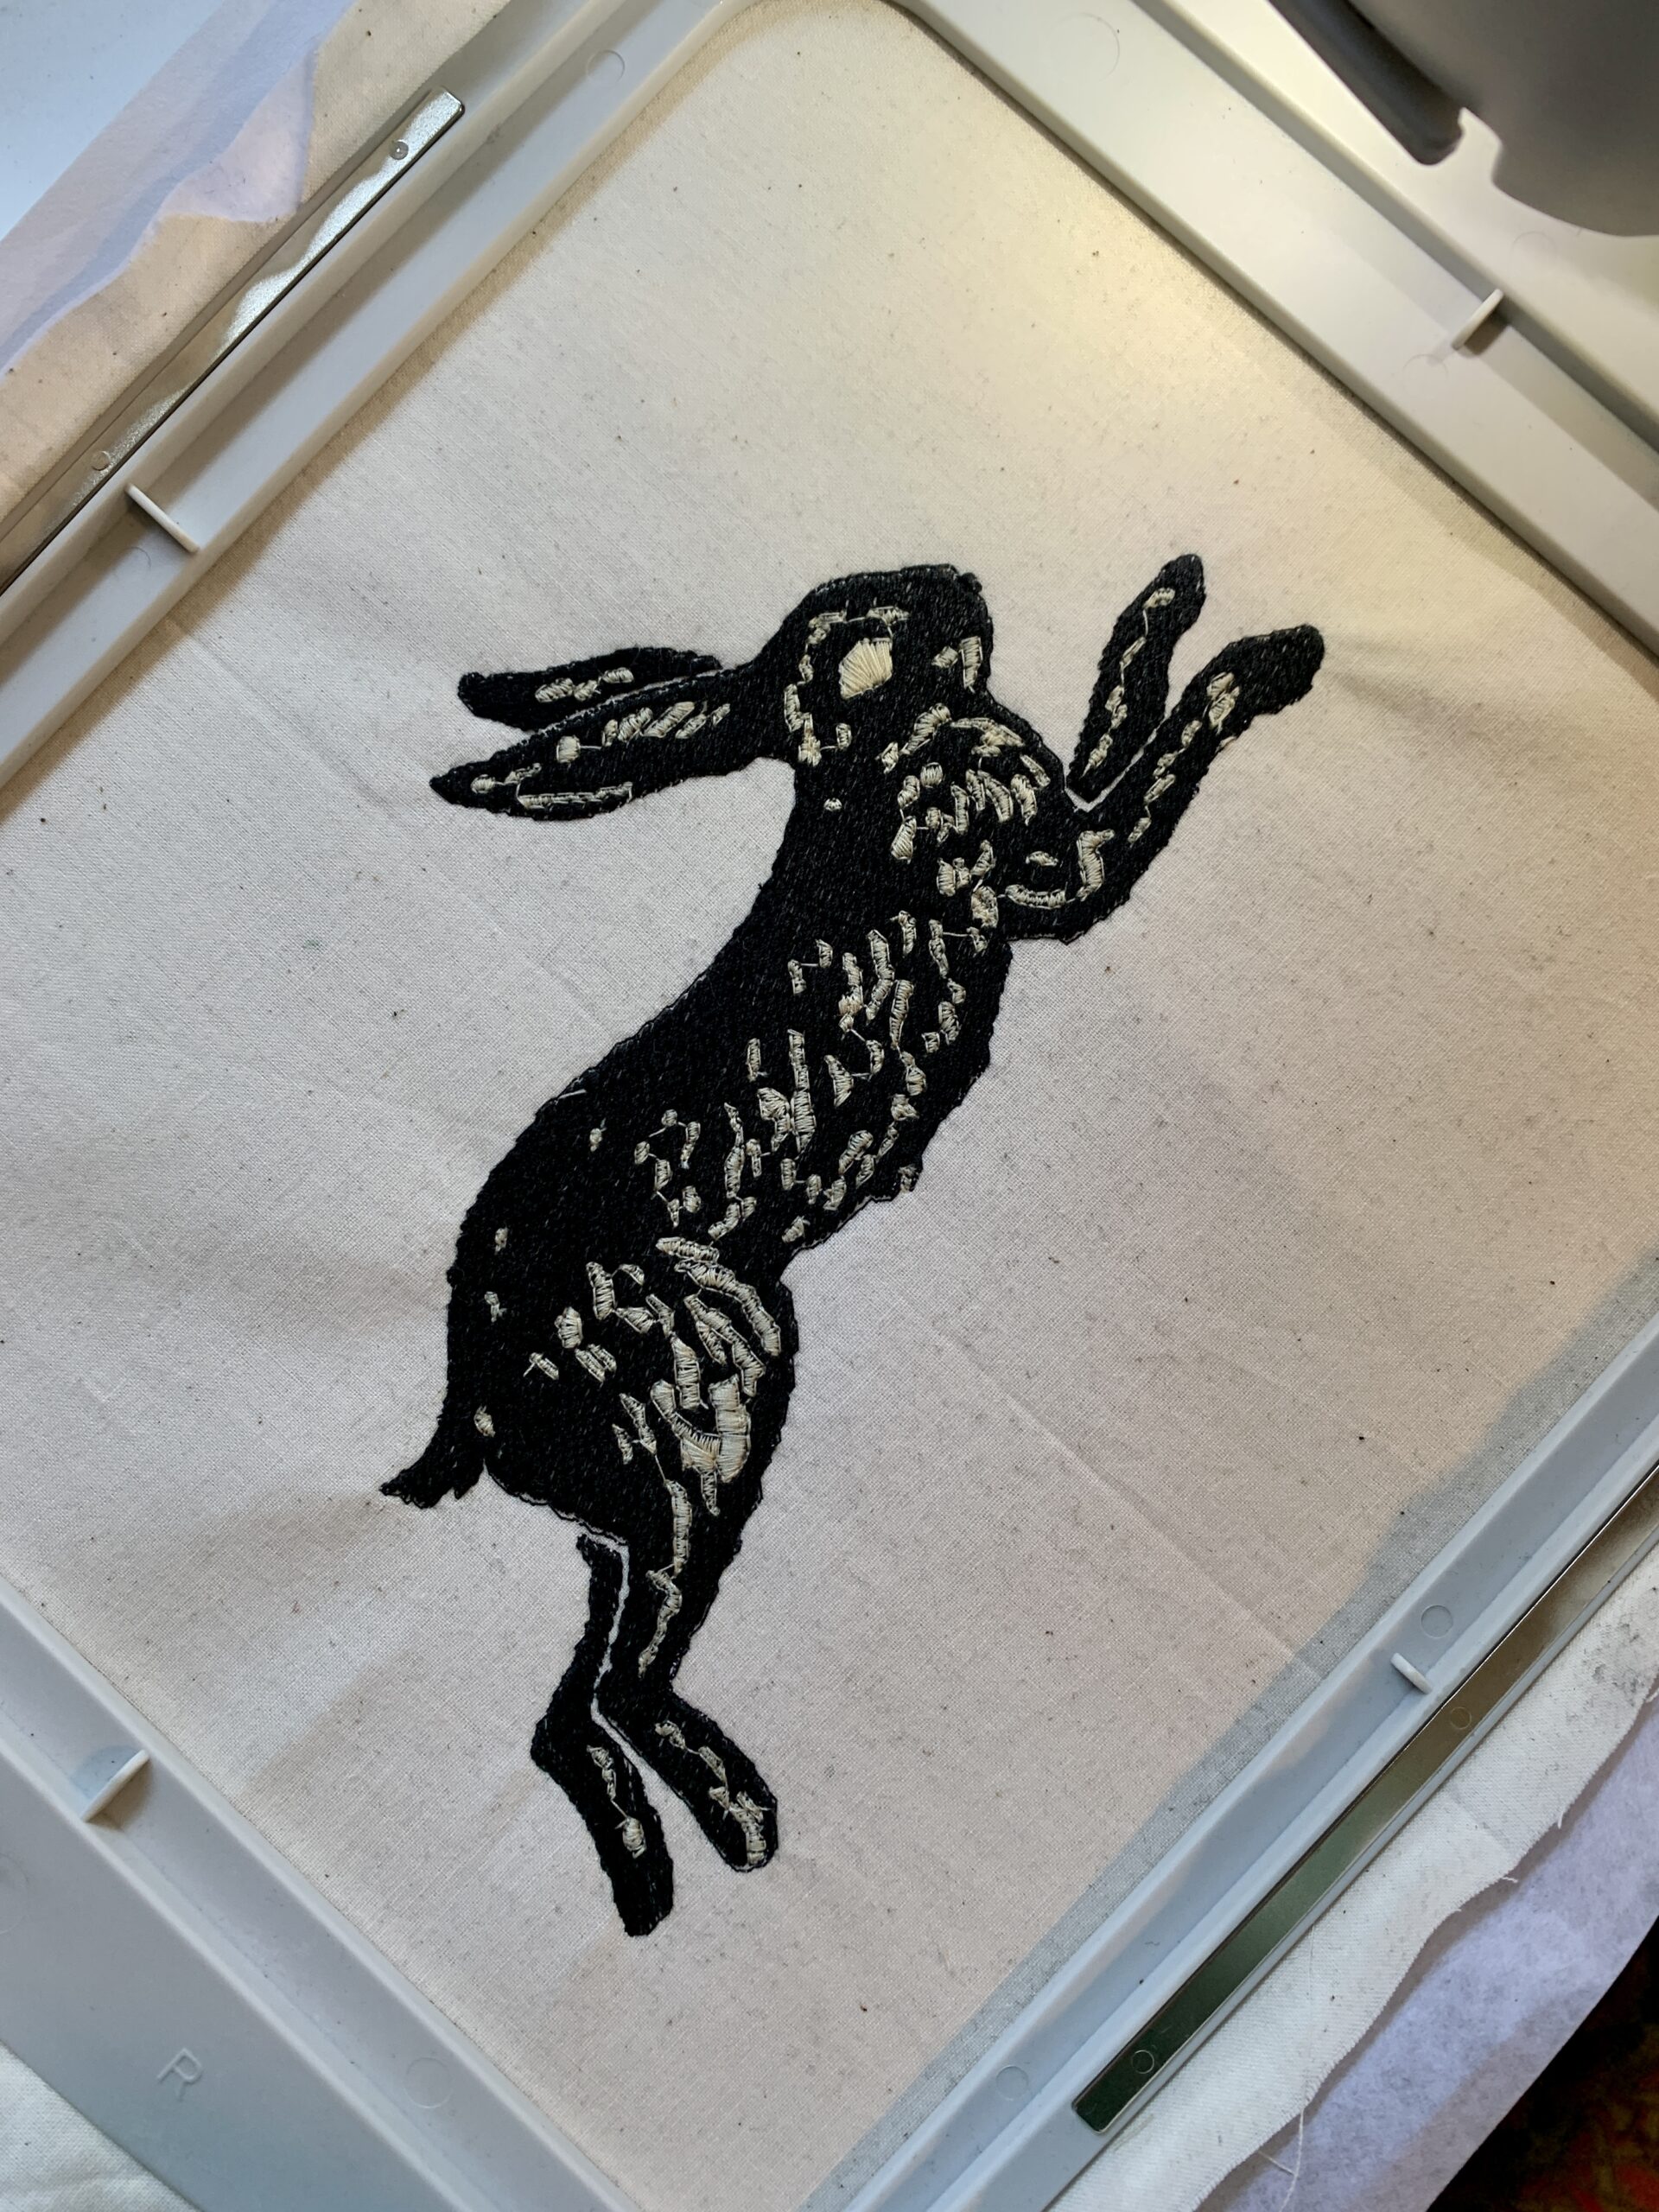
    First, my Skyline S9 outlined my rabbit, then began to fill it in. Finally, the texture was added.


    embroidery 1embroidery 2


    Once the stitching was complete, about half an hour later, I removed the hoop and trimmed my fabric down to the needed size.

    completed embroidery       completed embroidery 2


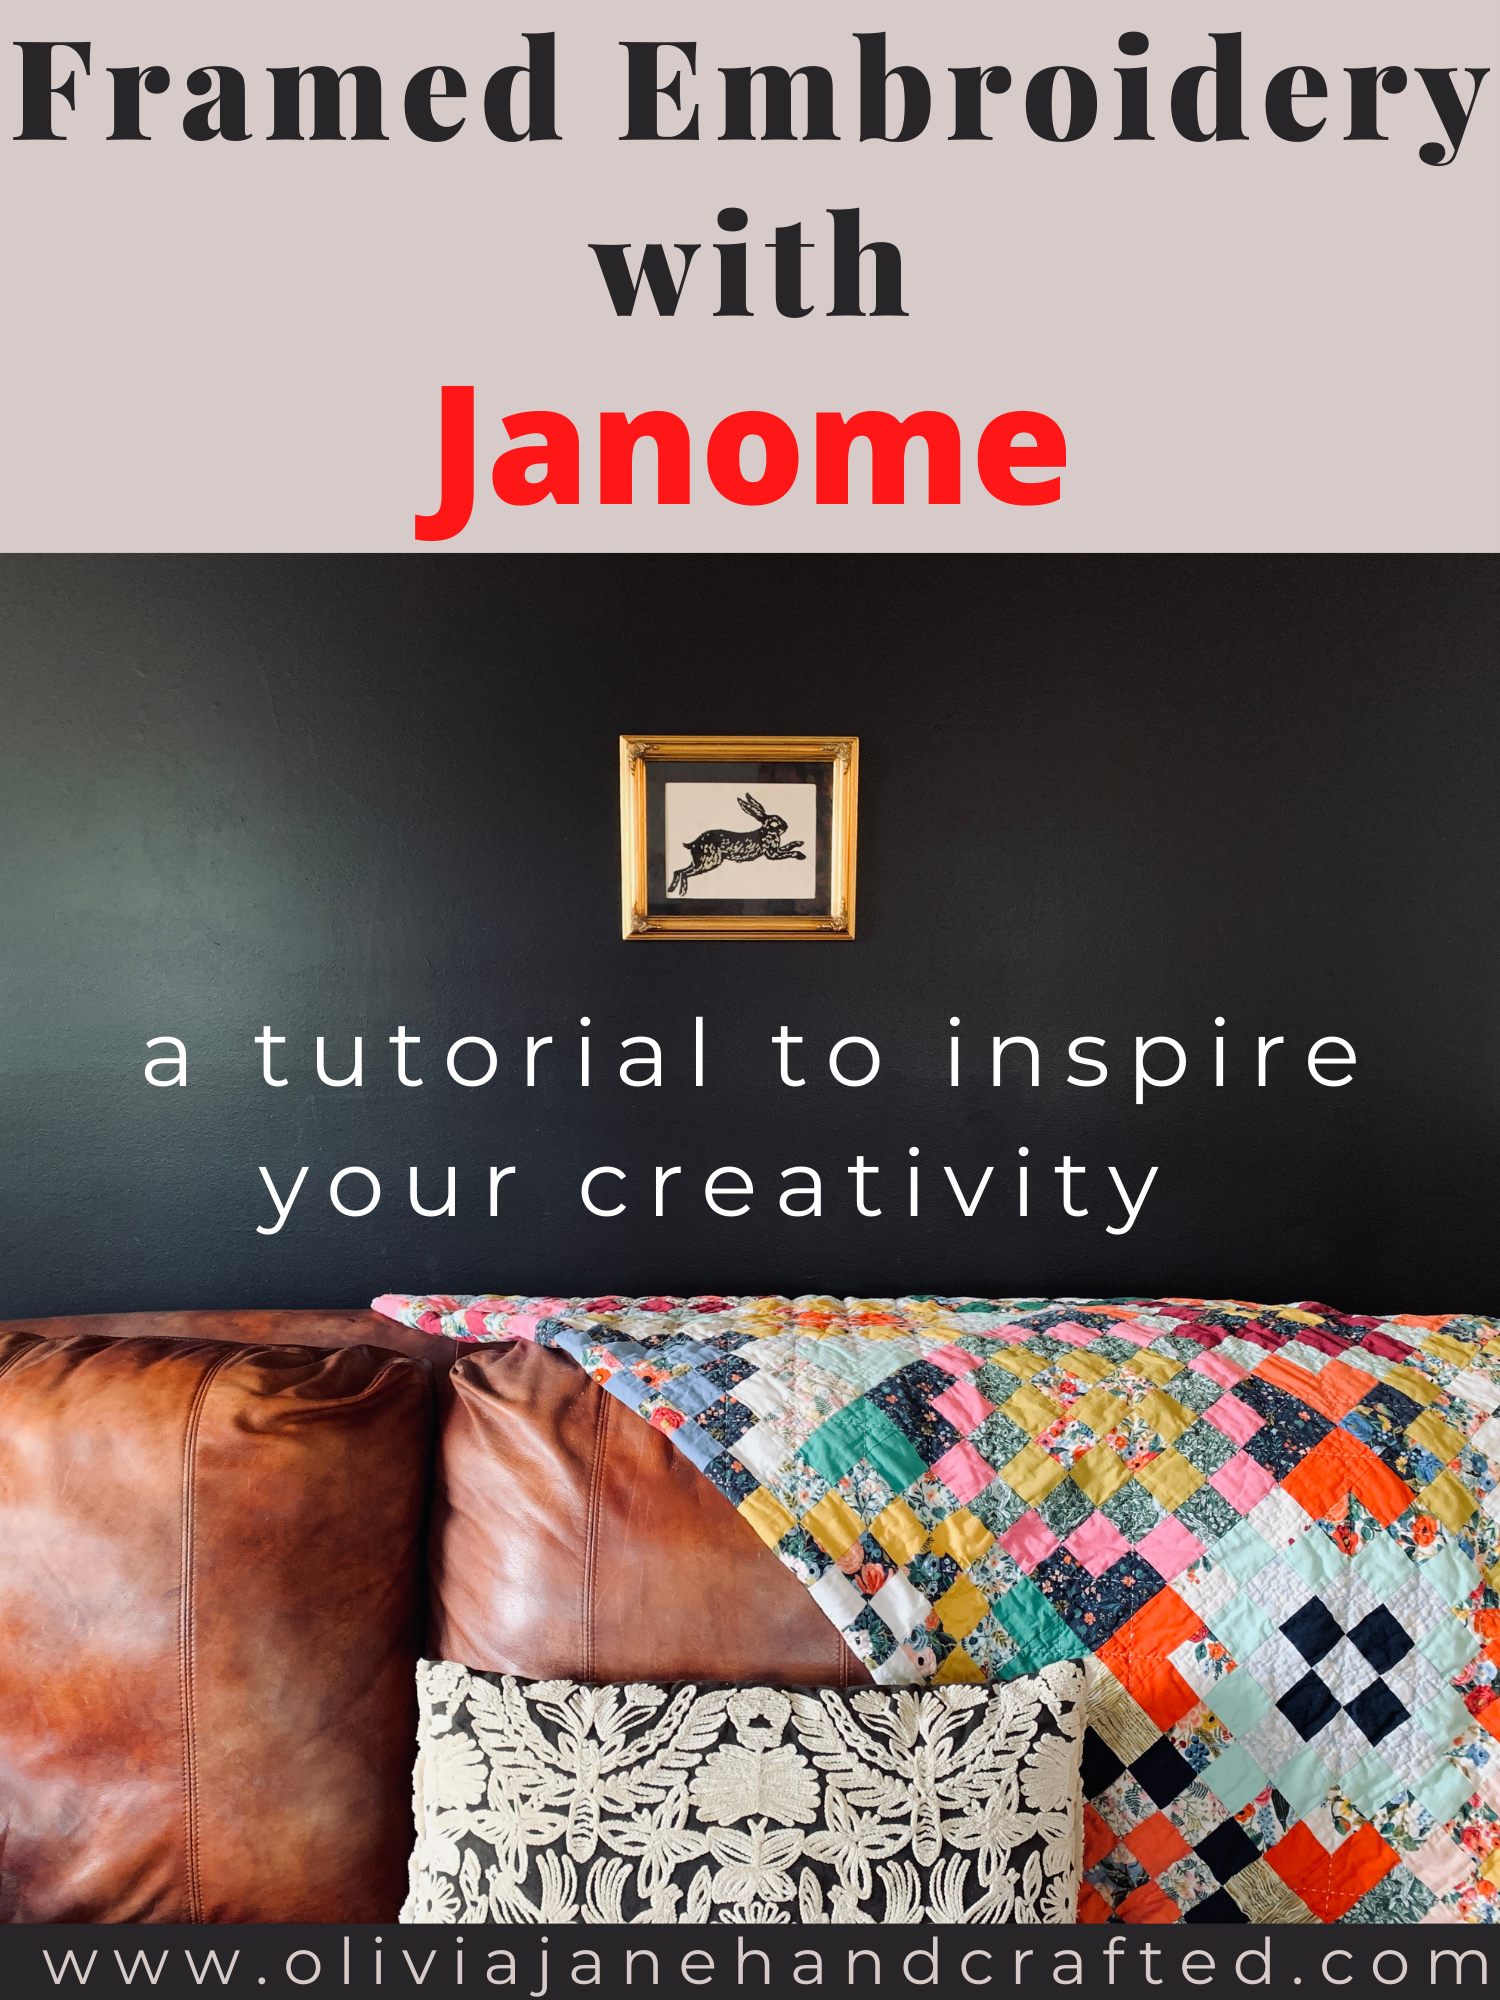
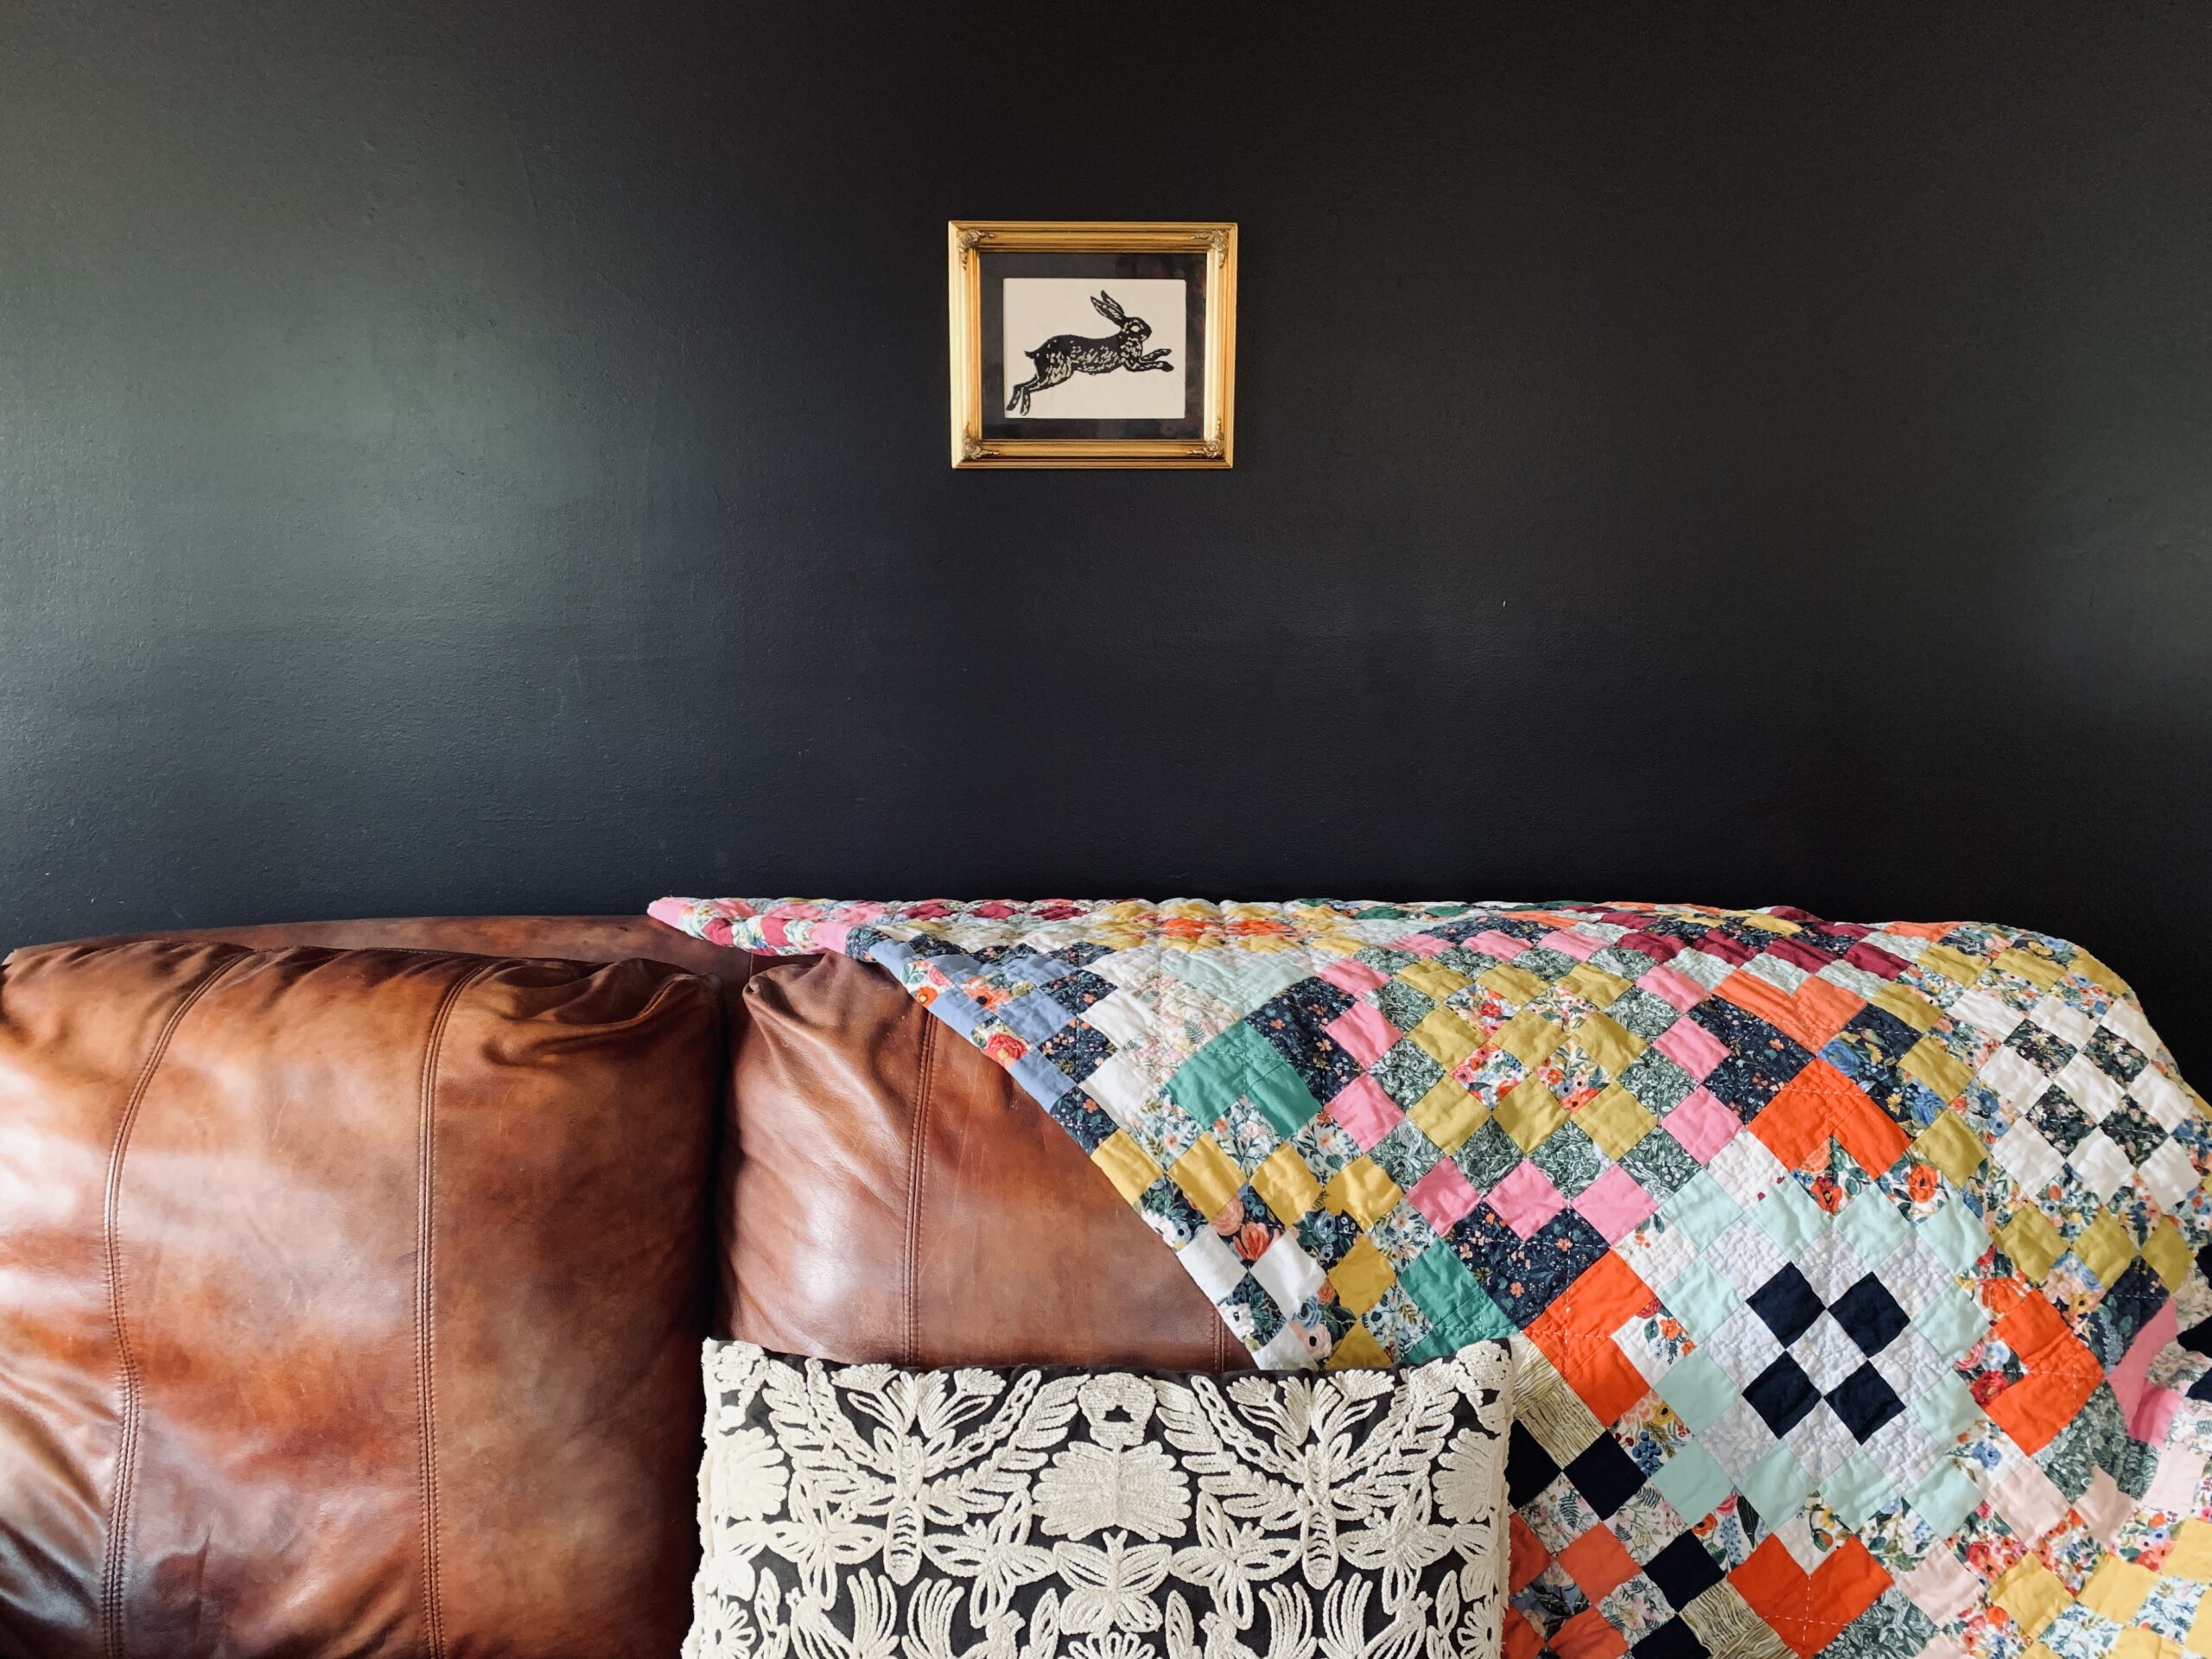
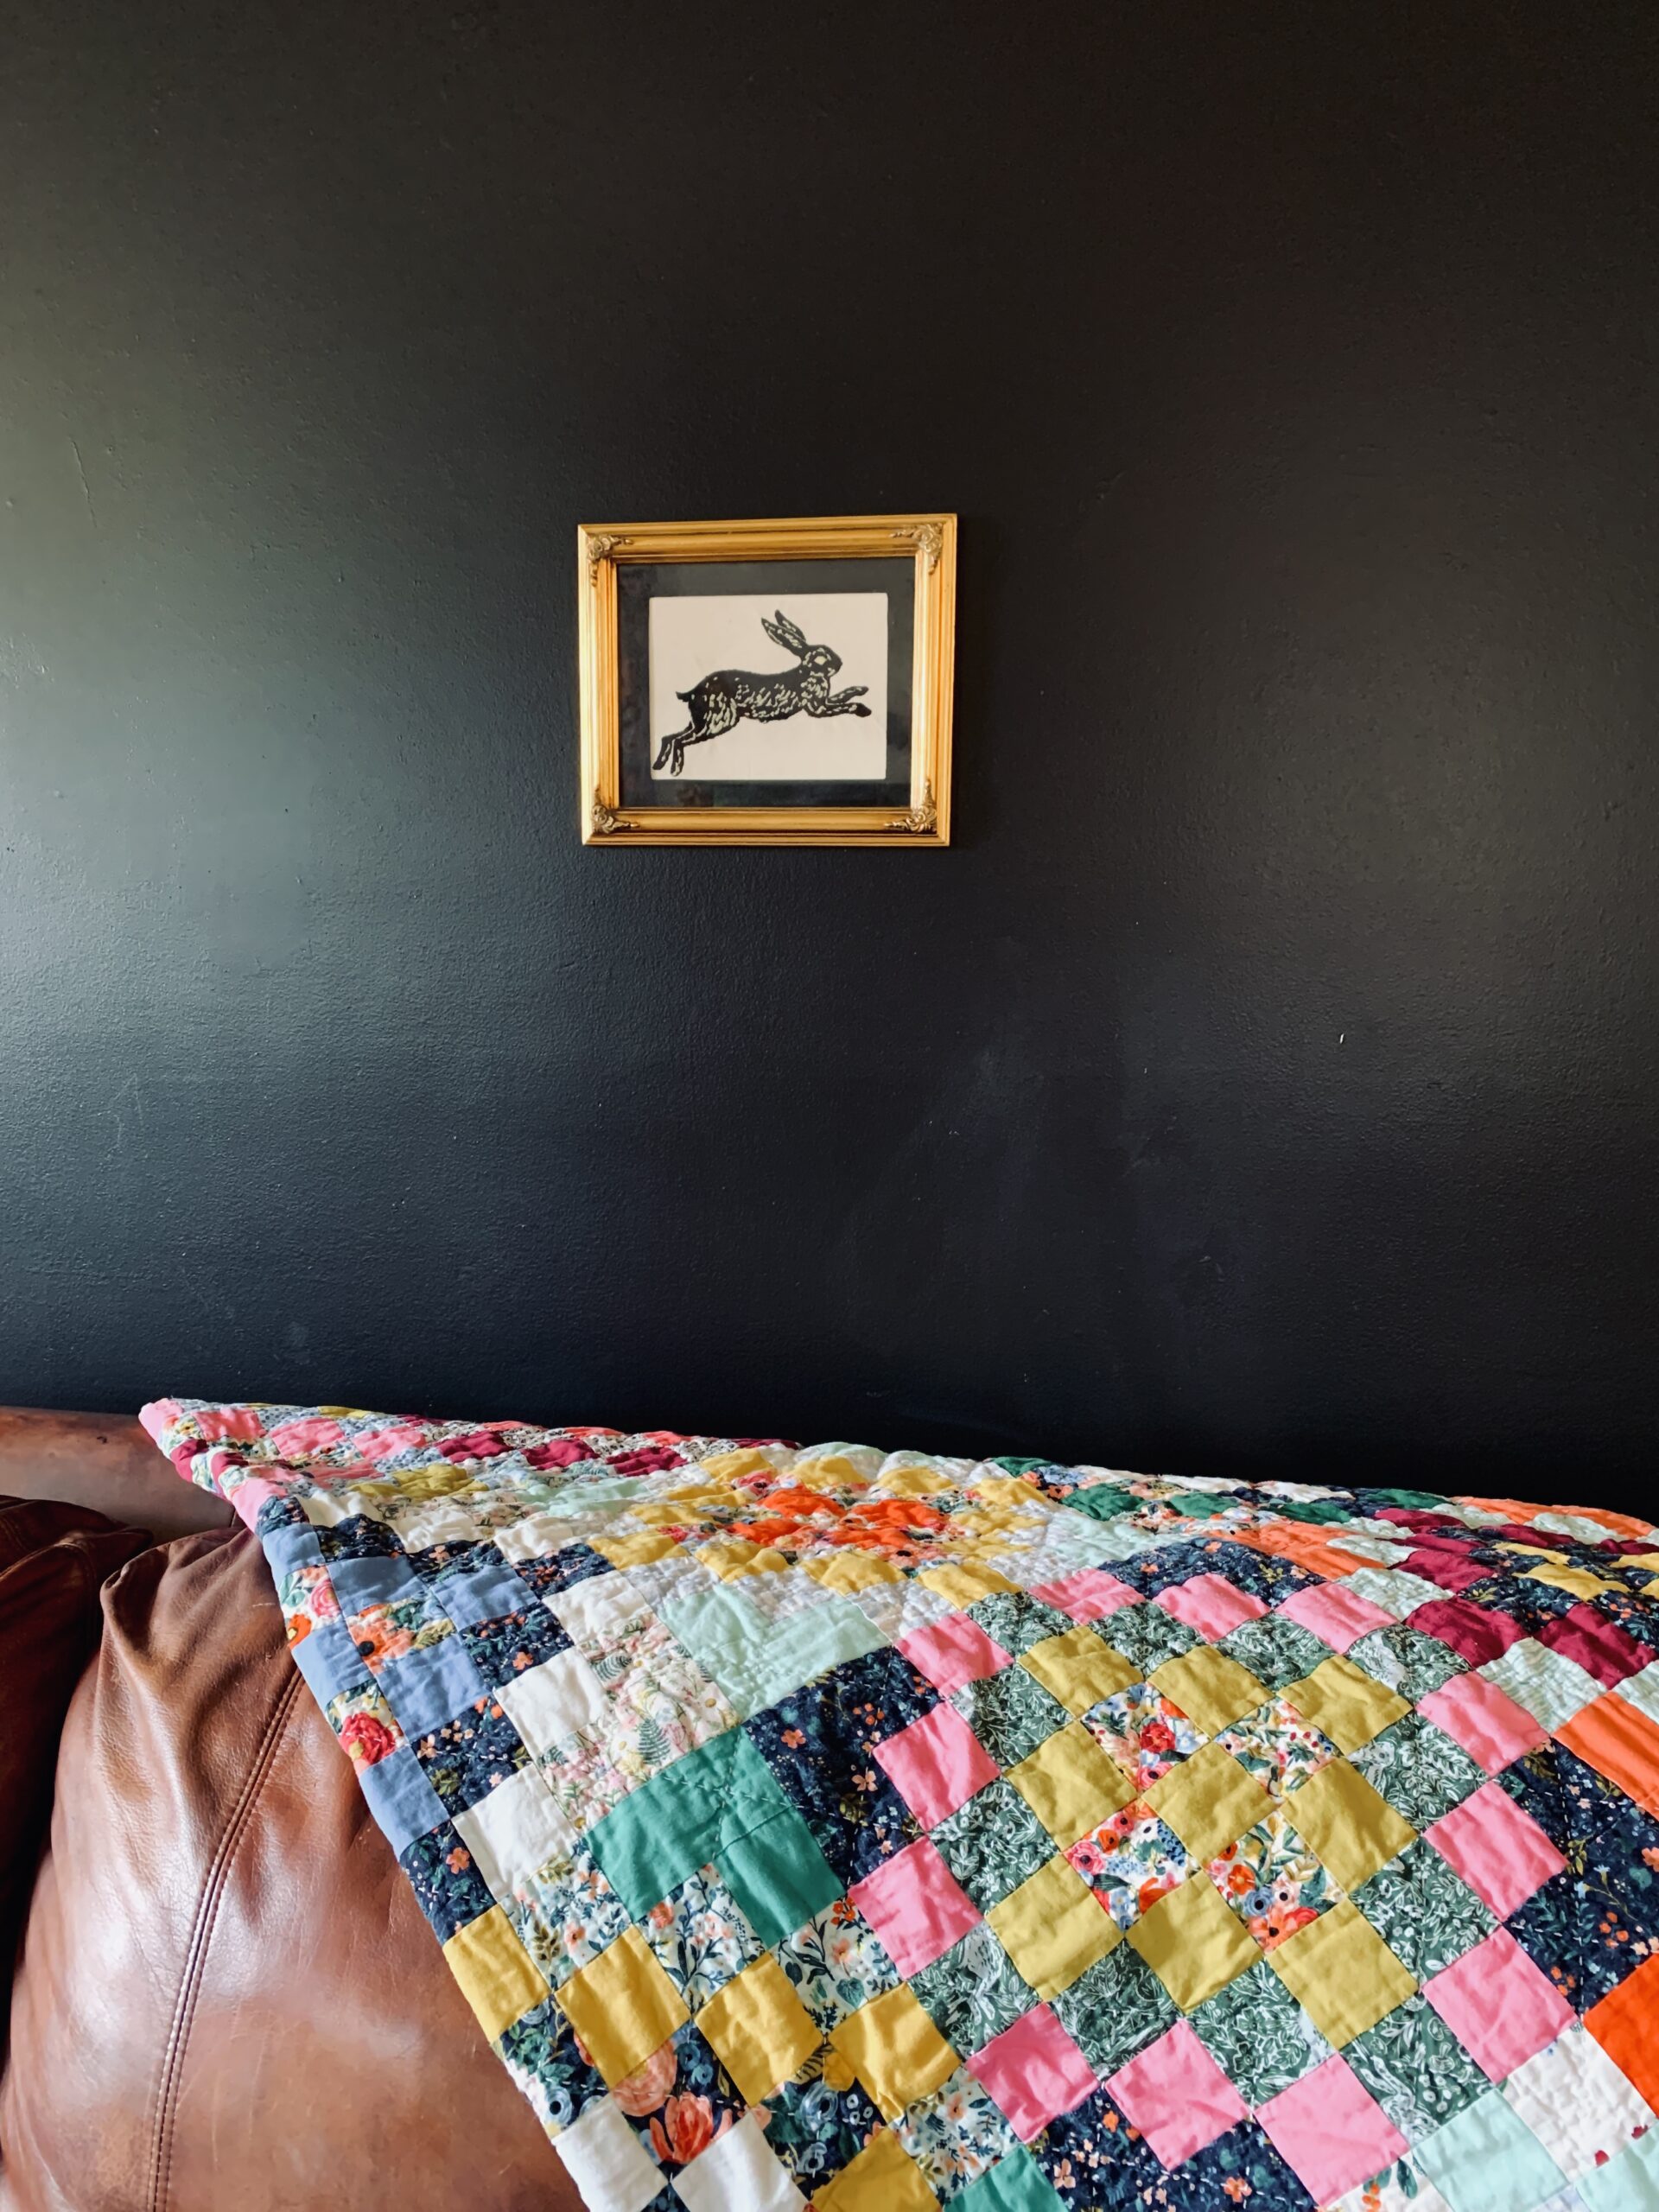
    I picked up this fantastic custom gold leaf frame from my local AmVets (a thrift store benefitting veterans) for only $1.98. I took it apart, removed the angel picture that it was holding and after painting the current cream color matte black with some acrylic paint, I remounted the frame.

    framed fable embroidery


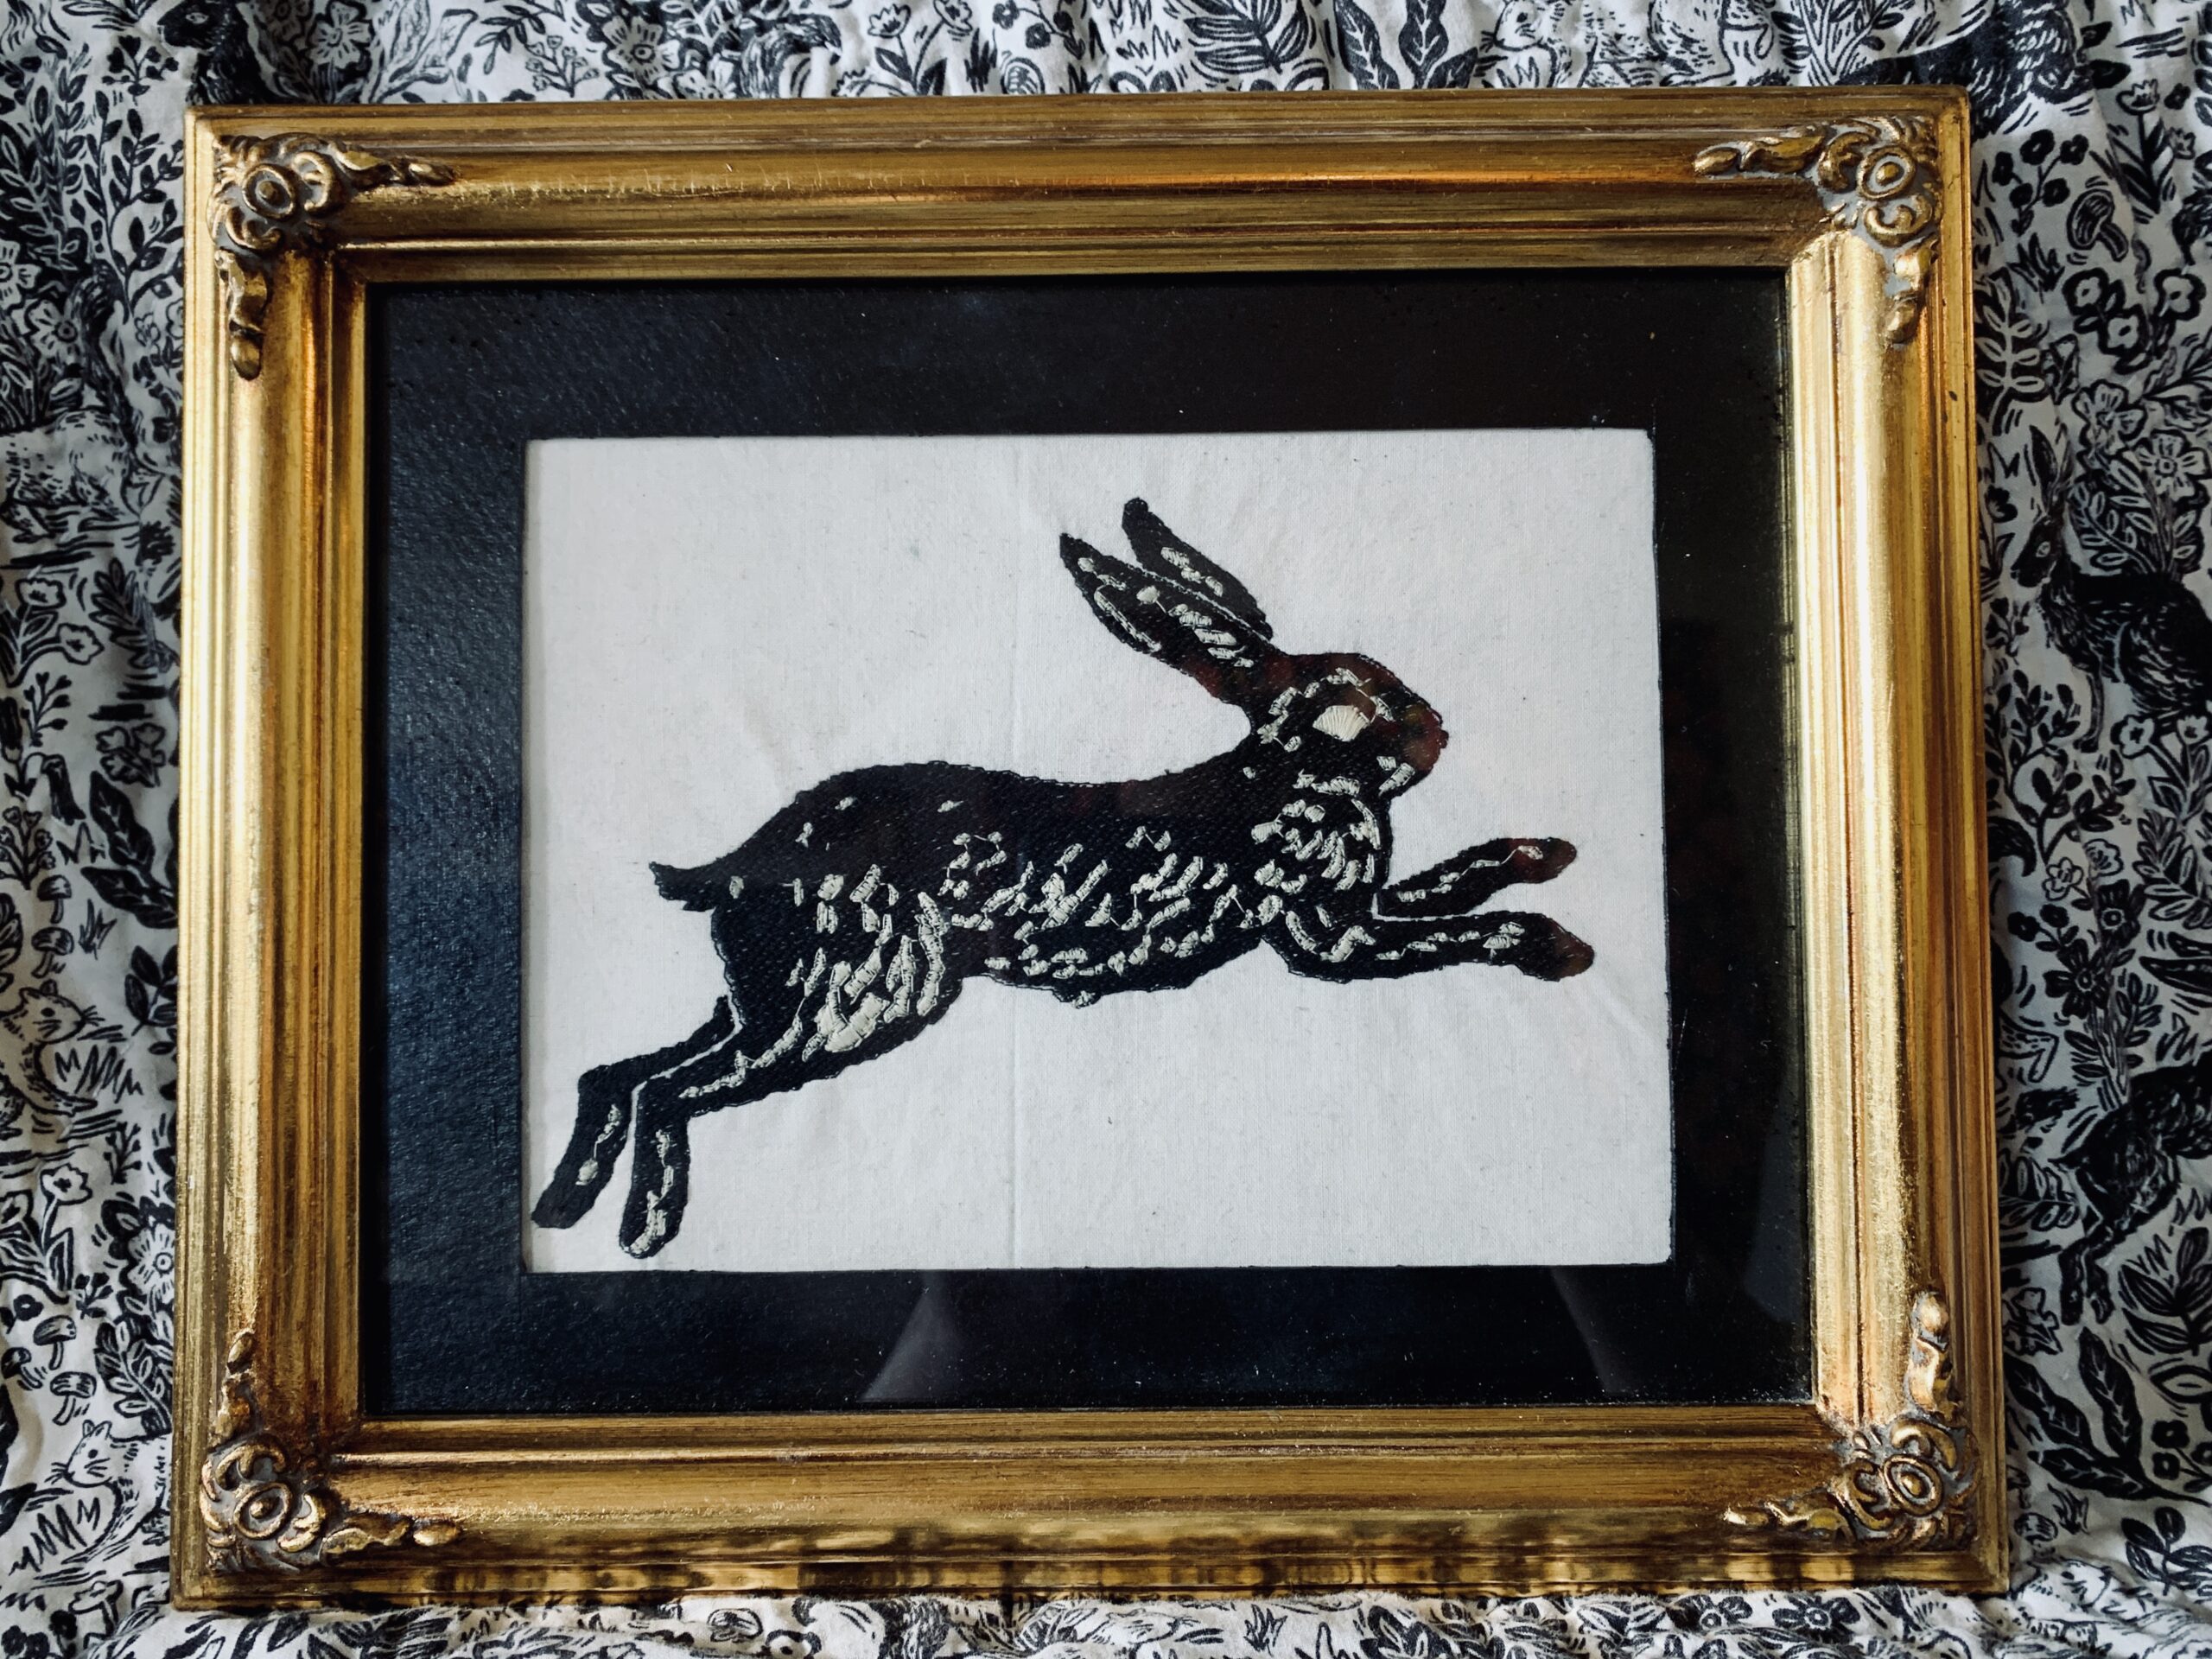
    I now have the beginning of a new gallery wall above our couch. The quilt you see here was made with Rifle Paper Co's Wildwood collection, which features the Fable print that I used for this embroidery art. We love small animals like rabbits and squirrels, so this was the perfect piece to add to our wall!

    framed embroidery


    The sky is totally the limit when you can create your own embroidery! I hope this will inspire you to create pieces that you love with your embroidery machine and Janome's Artistic software! I'll be adding some more pieces to my gallery wall with this method.

    framed embroidery 2


    Check out some of my other Skyline S9 projects HERE, and see the rest of my tutorials HERE. -Meredith

Prev 1 Next 

Tags

#freesewingtutorial 4th of July Applique Block of the Month Bunny Carolina Oneto Christmas Continental M7 Cosplay Cosplay Tutorial Costume Crafting Decorative Stitches DIY DIY Accessories DIY Father's Day Gift DIY skirt Embroidery Everyday Applique Father's Day Fiesta Weave Lunch Mats Fiesta! Four Fabric Quilted Project Bag Free Bag Pattern Free Pattern Free Quilt Pattern Free Sewing Free Sewing Pattern Free Sewing Tutorial free skirt tutorial Free tutorial Fun Projects Garment Sewing Good Tidings Quilt Along Green Goddess Dress Handmade Gifts Heidi Proffety Historical Costume Tutorial Holiday Sewing Home Decor How To How to Machine Bind How to Make a Quilt How to Make a Quilt. Free Quilt Pattern How to Make Panties How to Quilt How to Sew How to sew a top Janome Janome 9450 Janome AirThread2000D Janome Artisan Janome Artistic Digitizer Janome Conitential M7 Janome Continental M7 Janome HD3000 Janome Maker Janome MamoryCraft 15000 Janome MemoryCraft 15000 Janome MemoryCraft 6700p Janome S9 Janome Sewing Machine Janome Skyline S7 Janome Skyline S9 JanomeHD9 Lifestyle Machine Embroidery Maureen Cracknell MDW Melanie Call Memory Craft 15000 Moon Garden QAYG Quilt Block Mother's Day gift Napkins Patriotic Pattern Pillow Pillows Project QAYG Quilt Block Quilt Quilt As You Go Quilt Block Quilt Block Pattern Quilted Project Bag Quilting Quilting How to Quilt Rainbow Block of the Month Rainbow Quilt Block of the Month Rainbow Quilt BOM Reversible Zippered Pillow Rolled Hem Foot Scrappy Star Pillow Sew Sewing Sewing Machine Sewing Project Sewing Tutorial Skyline S9 SkylineS9 Stuffie Summer Sewing Project The Hype Tutorial Valentine's Day
DEALERS
The TWO Closest Dealers to you are:
1900 CENTRE ST , WEST ROXBURY MA, 02132
(617)323-6200
443 MOODY STREET , WALTHAM MA, 02453
781-893-3331
Find Additional Dealers